


Pilot Onboarding
welcome to
the pilot.
Between 5 October and 4 December you'll use sportsense with your own athletes, in training and at competitions, and the terms you use at the wall will shape its climbing tag library.
Get started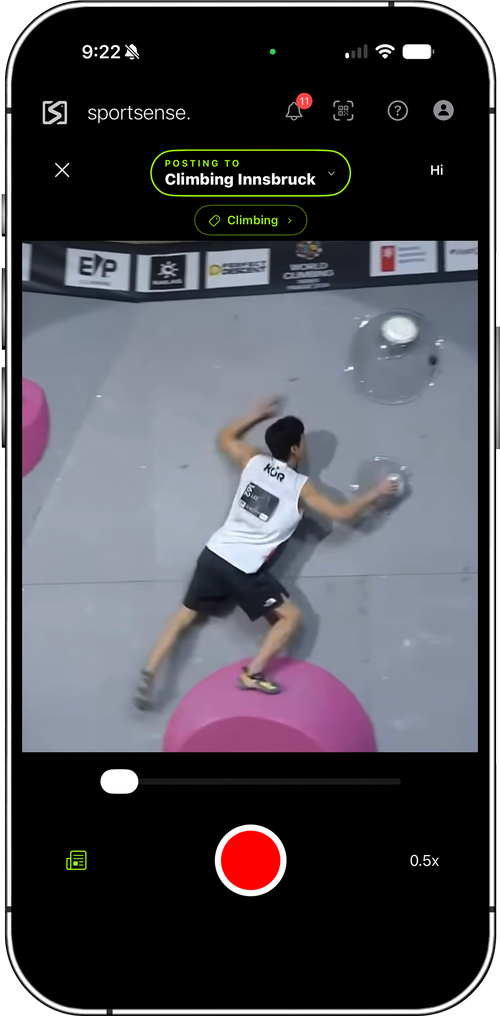
How the Pilot
Runs.
-
Mon 5 Oct
Start
Sign up, and we enable your Pro account.
-
Thu 8 Oct
Week 1 check-in
A feed, a first clip, and the analyzer basics.
-
Thu 15 Oct
Week 2 check-in
Climbing tags and recorded feedback.
-
Early Nov
Half way
A check-in on a call or in person.
-
Fri 4 Dec
End
Results against the success criteria.
What we ask
- Two sessions a week with your own athletes, about two hours in total
- Film attempts and build a small set of reference clips
- Film at least one competition or mock comp in the window
- Tell us what's working and what isn't, as you go
What you get
- A Pro account for the whole pilot
- A weekly meetup on Thursdays, and email support from Rich
- Everything you build in the pilot stays yours
Full terms and success criteria: sportsense.coach/cec-pilot
Get
Started.
0.1
Download & Sign Up
- Download sportsense from the App Store or Google Play.
- Sign up with the email address this was sent to.
- We'll enable your Pro account on our end.
Three Steps,
Every Session.
Capture
Film the attempt in the sportsense camera and say what the athlete is doing. Jump to your first clip

Capture &
Analyze.
By the check-in on Thursday 8 October you'll have a feed with your athletes in it, a first clip posted, and the analyzer basics.
1.1
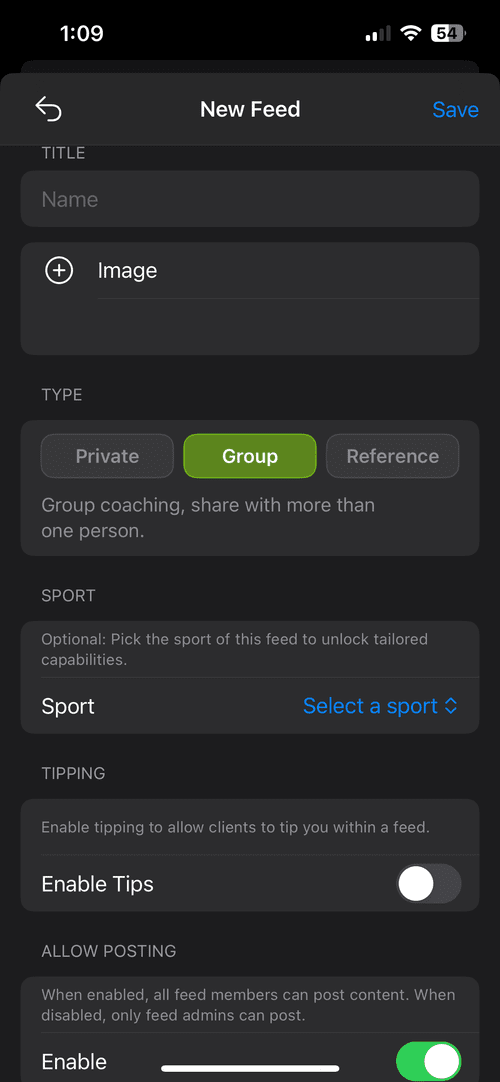
Create a Feed
- Tap Share at the bottom right, then + at the top right.
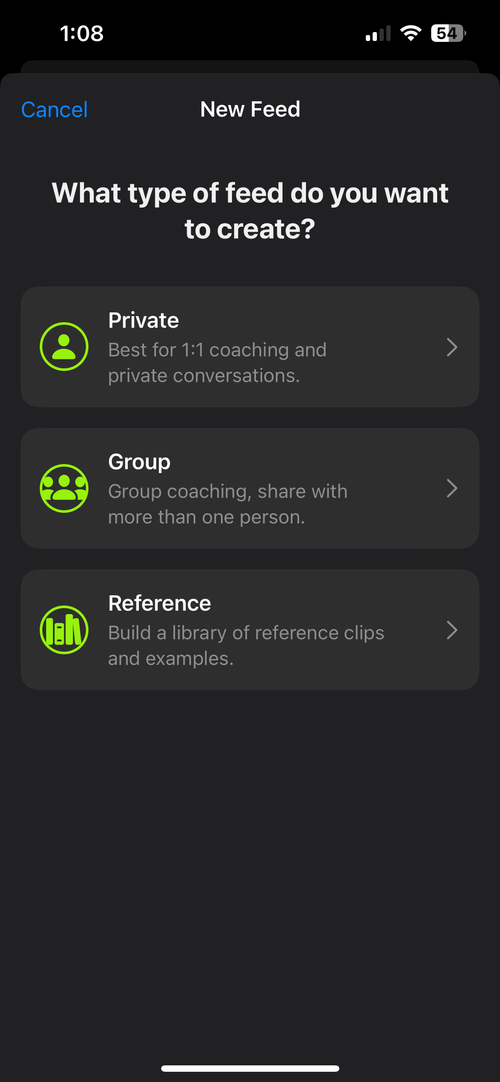
- Choose Group for a squad, or Individual for one athlete.
- Name the feed, set the Sport to climbing, and save it.
1.2
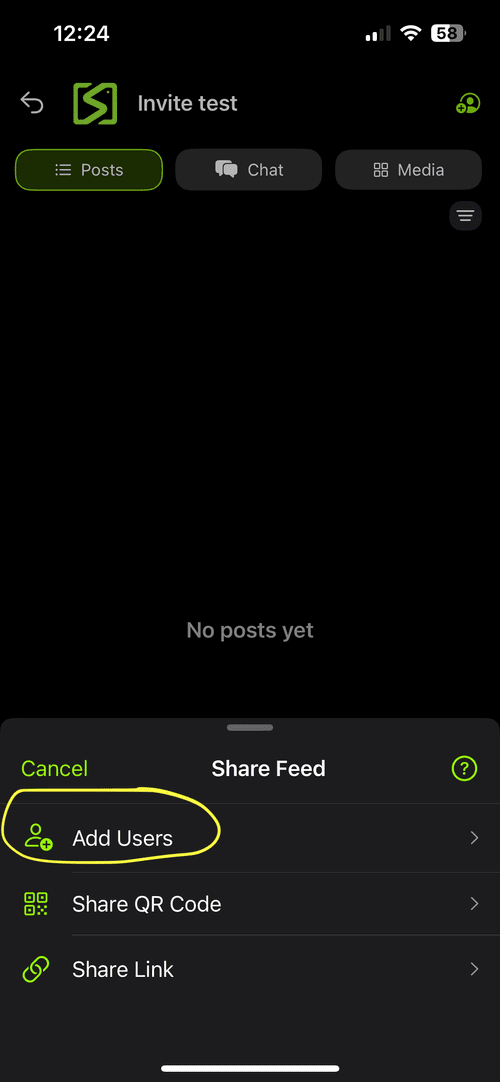
Add Your Athletes
- Open the feed and tap the invite icon at the top right.
- Choose Add Users to invite by email, or Share QR Code for athletes standing next to you.
- sportsense is free for athletes to download and view their feeds. Anyone under 18 needs a parent or guardian to give consent when they sign up.

1.3
Post Your First Clip
- Open the sportsense camera and set the feed in the Posting To selector at the top.
- Record an attempt and say what the athlete is doing as you film, and the tags are added and the clip organized as it goes into the feed.
- Anything the app can't place lands in Untagged.
1.4
Analyze a Video
- Tap a clip in your library or a feed to open it in the analyzer, and swipe left or right to move between clips.
- Find the moment with the haptic scroller, then step frame by frame.
- Draw lines and angles from the bottom menu, and tap the back arrow on the left of the draw menu to undo.

1.5
Compare Two Attempts
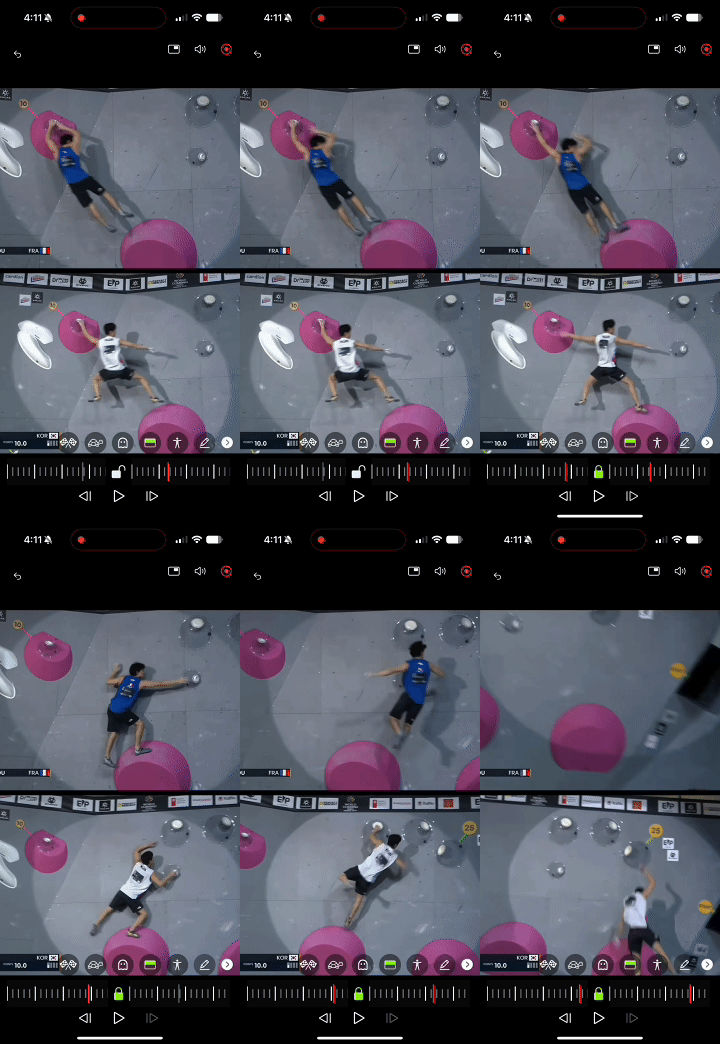
- In the analyzer, tap the black and white square in the bottom menu and pick the second clip.
- Line both up on the same move with the haptic scroller, then step through frame by frame.
1.6
Skeleton & Angles
- Turn on the skeleton for frame-by-frame and slow-motion work, and tap it again for the center of gravity tracker.
- Tap two segments of the skeleton to read the angle at a joint.

Week 1 check-in · Thursday 8 October, 12:00 pm Pacific (3:00 pm Eastern), 30 minutes. We sort out whatever got in the way.
Tag &
Share.
Week 2 adds the climbing tags and recorded feedback in your athlete's feed.
2.1
Climbing Tags
- Open the camera and tap the tag button under the Posting To selector to see every tag.
- The sheet has four groups: Problem 1 to 7, Technical Skills such as drop knee, heel hook and dyno, Wall / Grade from slab to roof plus V1 to V17, and Holds such as jug, pocket and undercling.
- Say tags as you film, for example "Maya, problem 3, drop knee on the overhang", and the words that match a tag become tags when you post.
- When the word you use isn't on the sheet, pick the nearest tag by hand and send us the word you used.

2.2
Record & Share Your Feedback
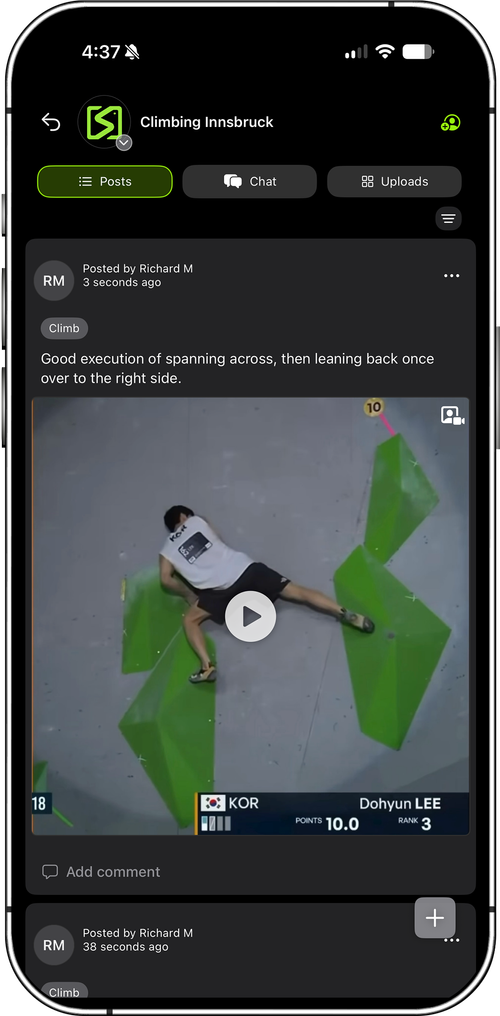
- In the analyzer, tap Record in the top right to capture the screen and your voice as you talk through the clip.
- When you stop, share opens. Choose the athlete's feed, and the post carries a transcript and a written summary of your key points, which you can edit or add to with Voice to Text.
- You can also post straight from the camera, or long-press a clip in your library and tap share.
- Keep post titles short and searchable, since the media grid cuts them at about 25 characters.
Week 2 check-in · Thursday 15 October, 12:00 pm Pacific (3:00 pm Eastern), 30 minutes. We go through the climbing tags, recording and sharing feedback, and the terms you couldn't find a tag for.
Use It at
a Comp.
Film at least one competition or mock comp inside the window. A mock comp at your own gym is the easiest place to try it first.
Before
- Create a Group feed for the event, named with the event and the date.
- Check the organizer's rules on where you can film from.
- Bring a tripod or clamp so every attempt is filmed from one spot.
During
- Film each attempt and say the athlete and the problem, for example "Maya, problem 2".
- Clips file by athlete, with the problem tagged.
After
- Compare attempts on the same problem, an athlete against their own earlier go or against a teammate who sent it.
- Post feedback to each athlete's own feed.
Onsight rounds: athletes in isolation can't see the problems before they climb, and that includes clips on their phones. Keep the event feed to coaches until the round is over.
The Climbing
Library.
The tags in the app are a first version, and in phase 2 we build them into a climbing skills library with you, with reference clips for each skill organized by grade and hold type.
Being added
- Disciplines: bouldering, sport and speed
- A reference clip for each technical skill
- Changes to the first-version tags, from what you tell us
How you shape it
- Send us any term you couldn't find a tag for
- Where coaches name the same move differently, we agree one tag at the Thursday meetup
- Build a small set of reference clips, below
Build Reference Clips
- Create a feed and choose Reference as the type.
- Film one move per clip in a controlled session, cleanly and from a fixed spot.
- Tag the athlete, the skill, the wall and the hold, and title the clip with the skill it shows.
- Open a reference next to an athlete's attempt in compare.
The reference library guide covers filming and naming in more detail.
Tell Us What
Works.
Both of these reach Rich directly.
Email, any time
A bug, a missing tag, or something that didn't make sense. A screenshot helps.
Weekly meetup
Thursdays, 12:00 pm Pacific
3:00 pm Eastern, 30 minutes on video, 8 October to 3 December. The calendar invite has the link.
Pilot support · rich@sportsensetech.com