
sportsense
user guide.
sportsense helps you better leverage video while coaching in person or remotely. In this guide, we walk through how to use the app. Select a section below to get started.
Get Started.
New to sportsense? Download the app, create your account, set up your first feed, and get the core loop that everything else builds on.
Download & Create Your Account
- Download sportsense from the App Store (iOS) or Google Play (Android) using the buttons below.
- Open the app and tap Sign Up, then enter your name, email, and a password.
- Verify your email if prompted, then log in.
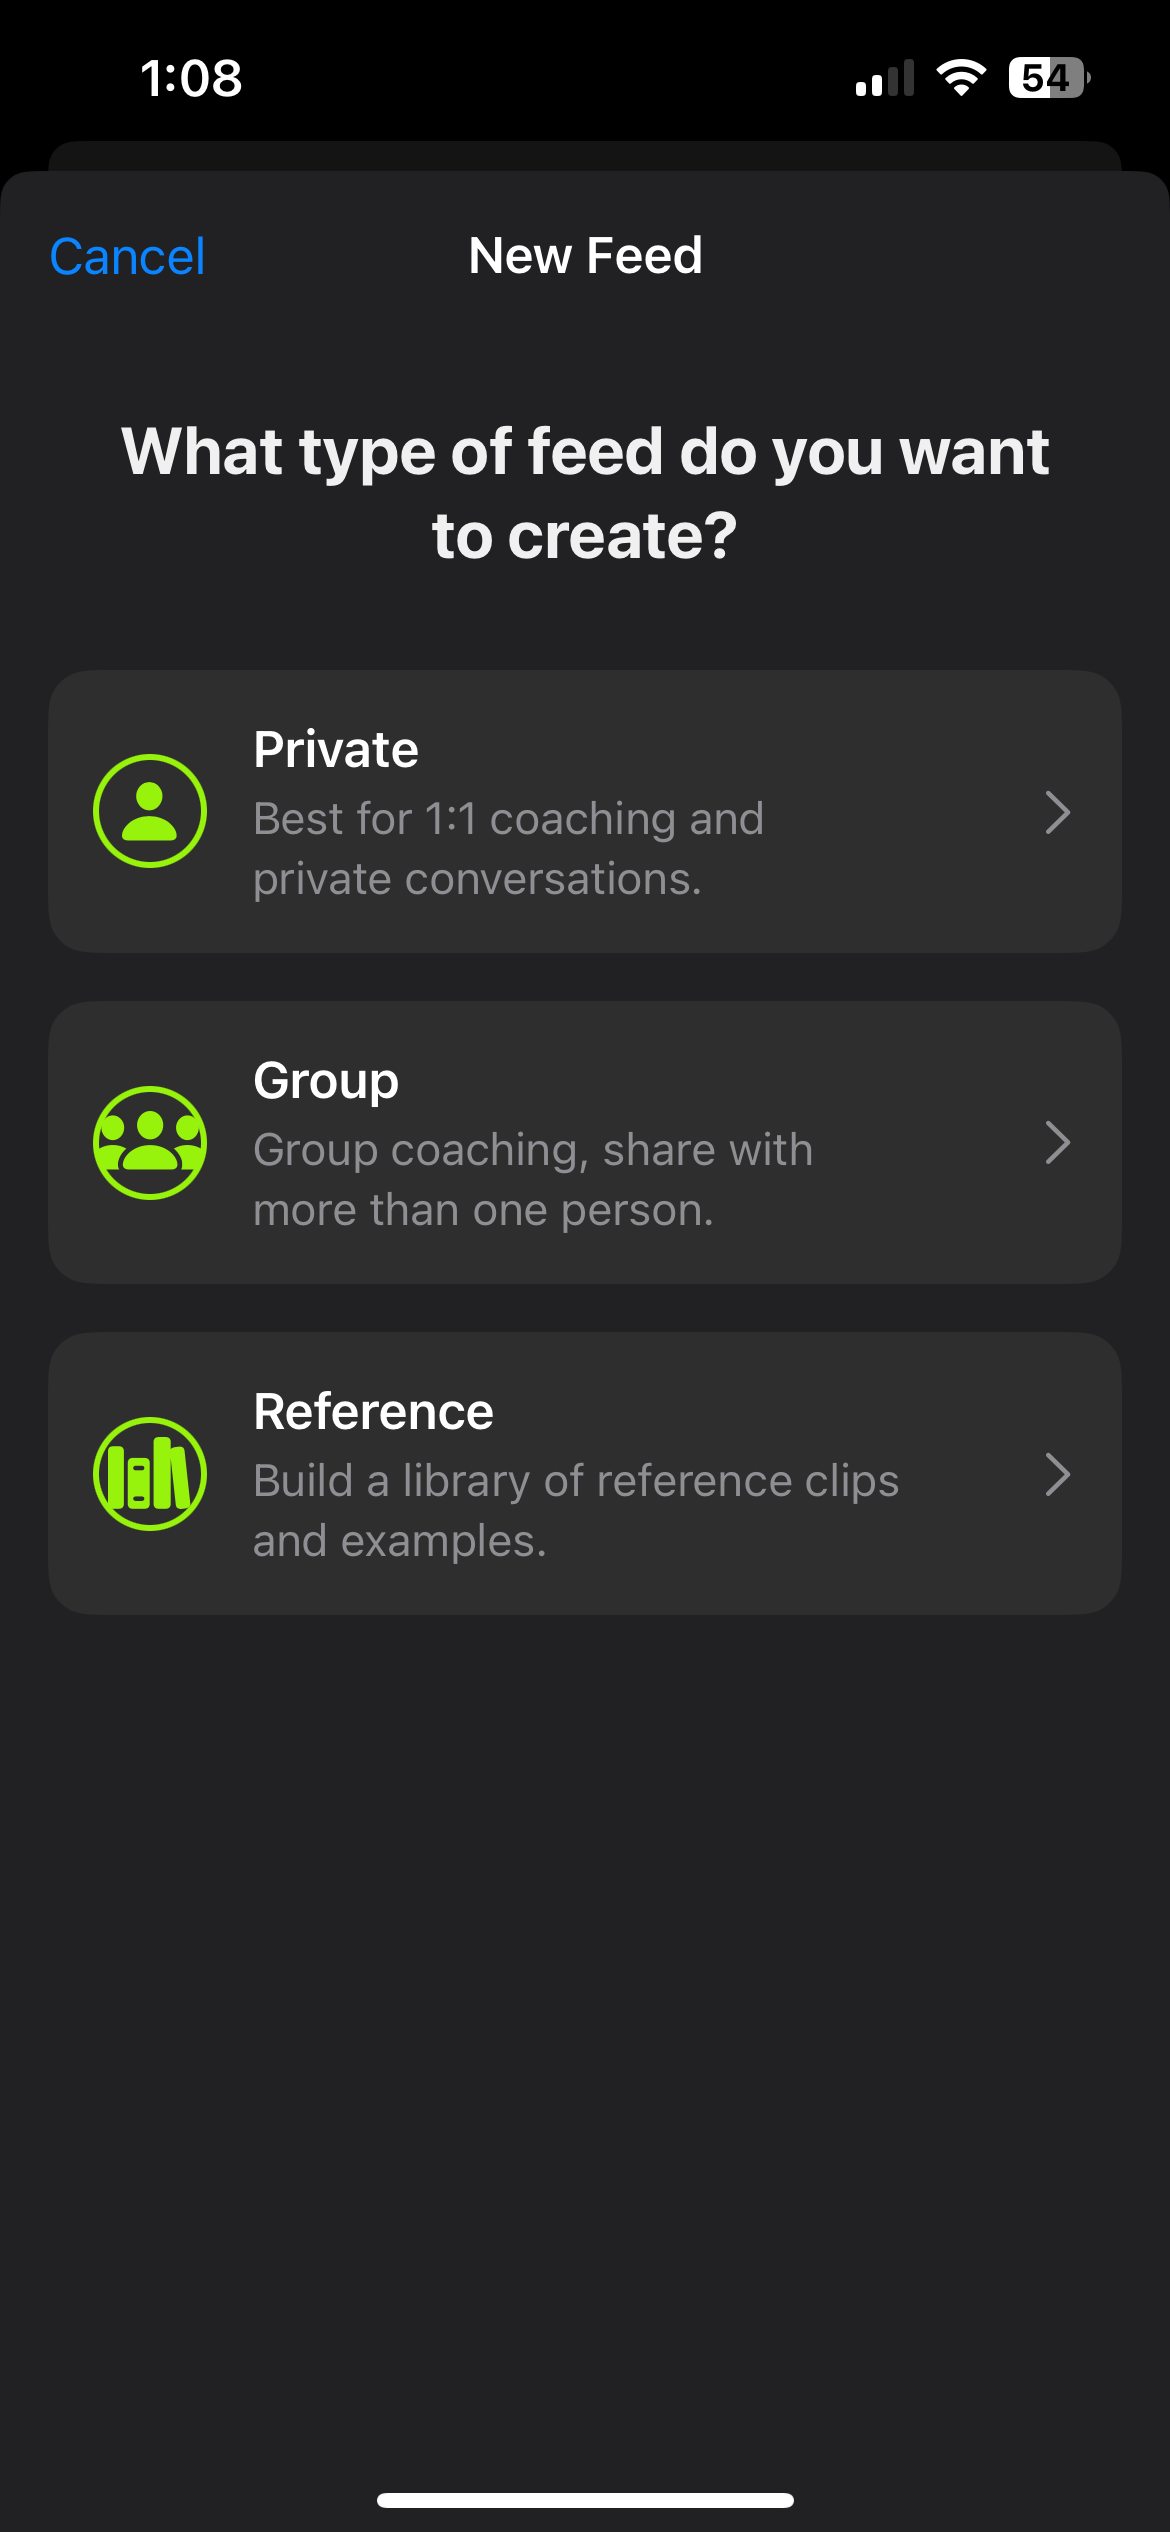
Create Your First Feed
A feed is a private space where you and your athletes share video and feedback. It is the home for everything you coach.
- Open the Share tab and tap the + button in the top right.
- Give the feed a name and choose the type: private for 1:1, group for a squad, or reference for a shared library.
- Set the sport so the app can tag and suggest the right way, and add a cover image if you like.
- Tap Create. You can edit any of this later from the feed title.
The Core Loop
Everything in sportsense builds on one short loop. Once this feels natural, the rest of the guide is just detail.
Capture
Record in the sportsense camera or add a clip from your camera roll.
Analyze
Open the clip in the analyzer and break the movement down with overlays, angles, and slow motion.
Voice your feedback
Talk through the clip and hit record to capture your coaching as you go.
Share it
Post it to the athlete's feed, and sportsense tags and files it by athlete and skill automatically.
Analyze.
Everything you need to break down video. From importing media to drawing annotations and running skeleton analysis.
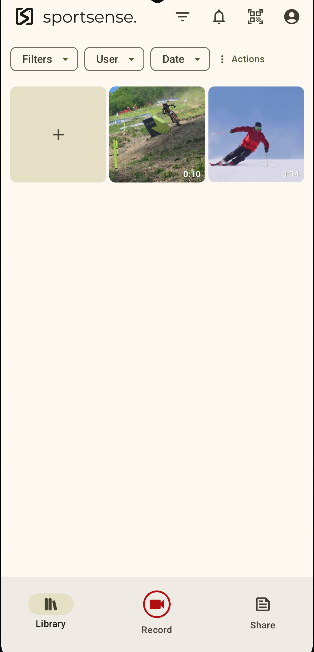
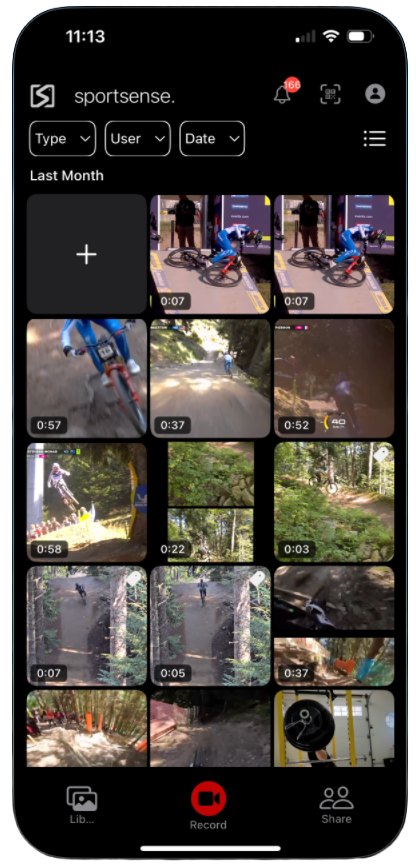
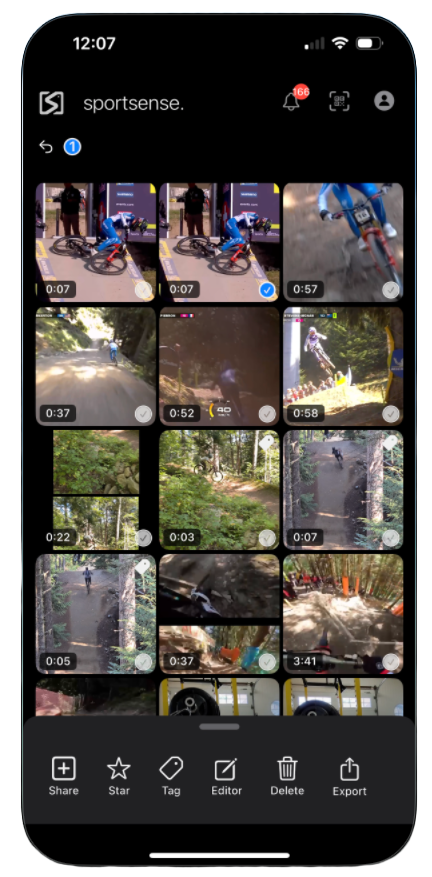
Adding Media to sportsense
- Add video two ways: bring clips in from your phone to your library, or record directly in the sportsense camera.
- When you are in a feed, tap the plus in the bottom right to add media from your phone or straight from your sportsense library.
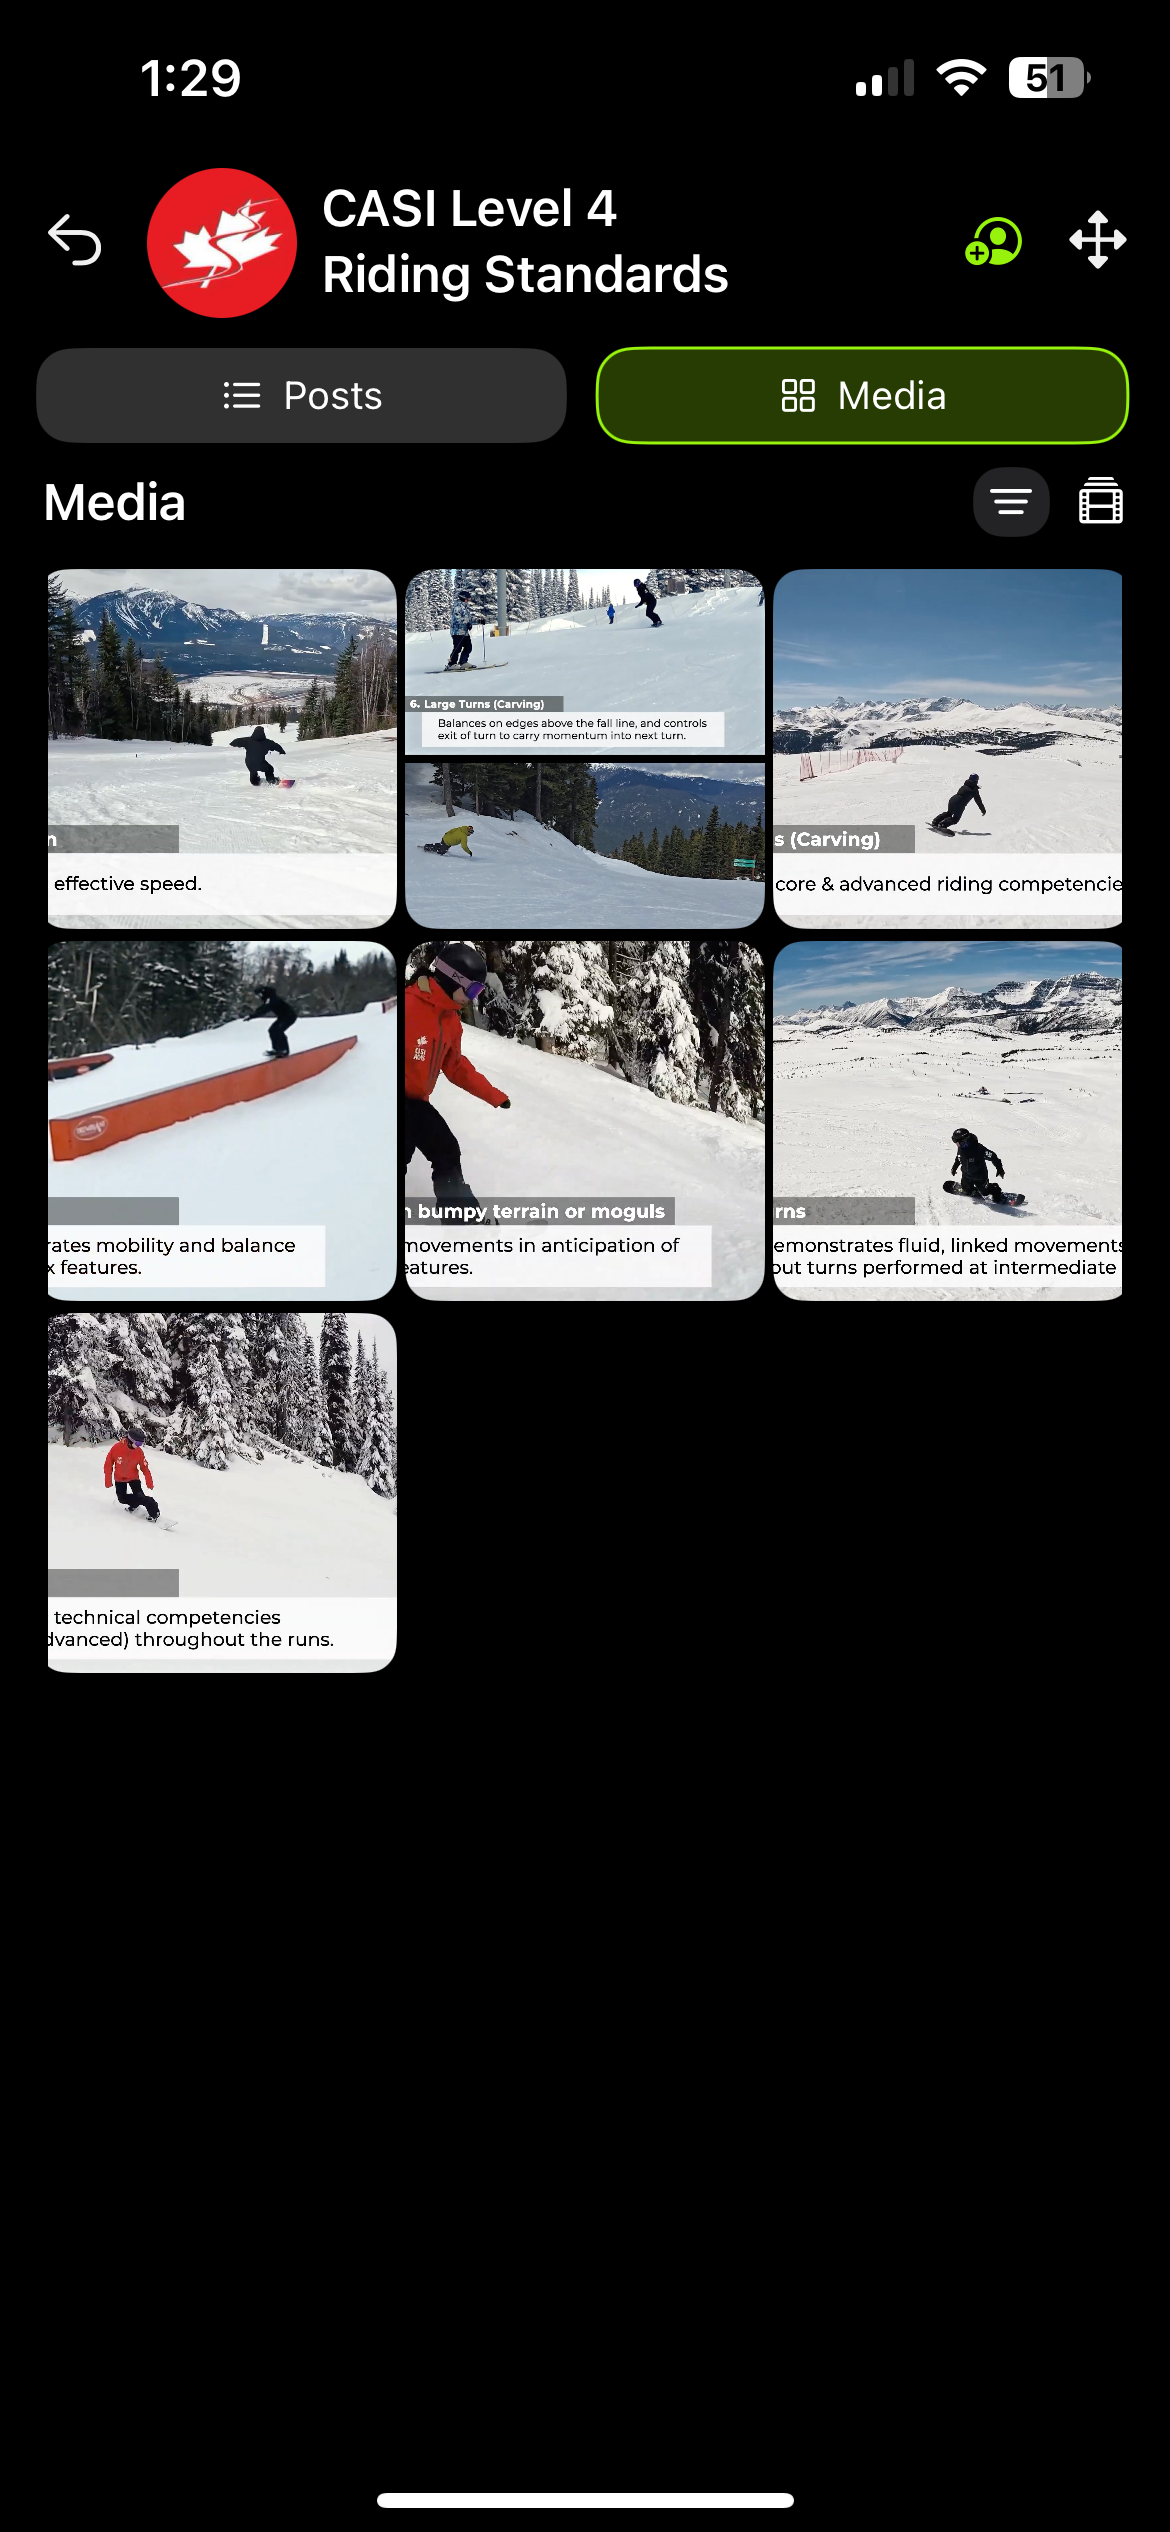
- Video added to a feed is organized automatically by the audio in the clip. Talk over the video and name the rider and the skill, and sportsense tags and files it for you.
- Filter by Type, User, and Date in the top menu to sort your library, including by tags.
- The users you can tag come from the people you share a feed with.
- Long press a media item for more actions.
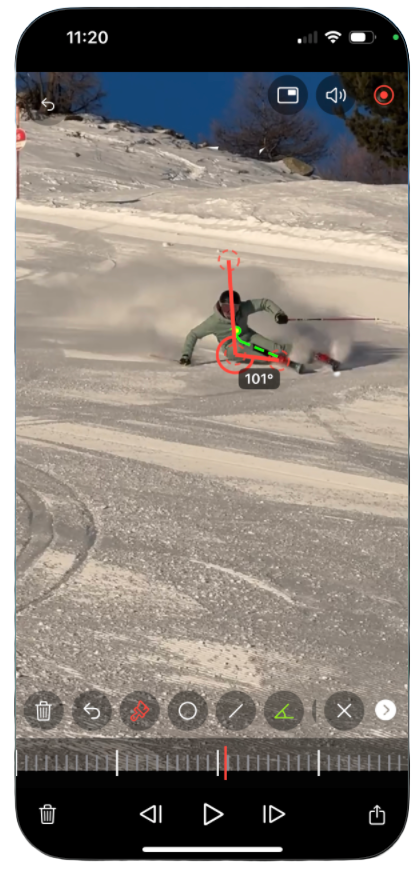
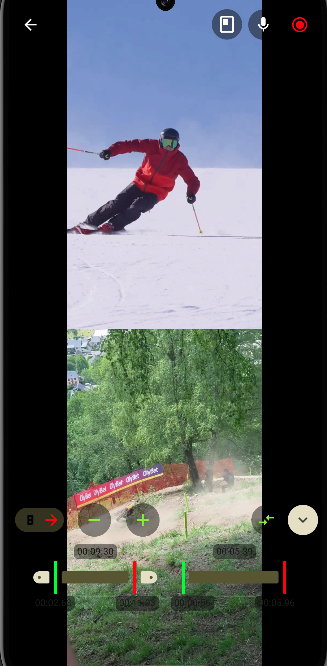
Analyzing a Video
- Tap on a video to enter the analyzer from the library or a feed.
- Swipe left or right to move between library videos while in the analyzer.
- The bottom menu has useful tools for analysis.
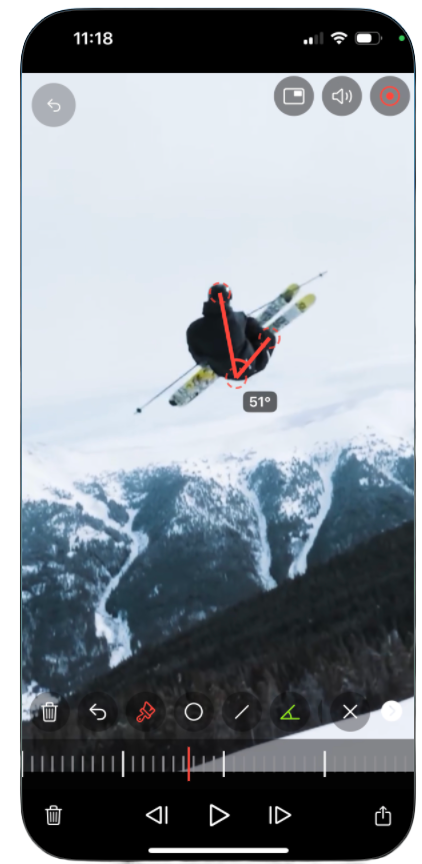
- Drawing includes lines and angles.
- Pinpoint a moment with the haptic scroller.
- Adjust with frame-by-frame for precision timing.
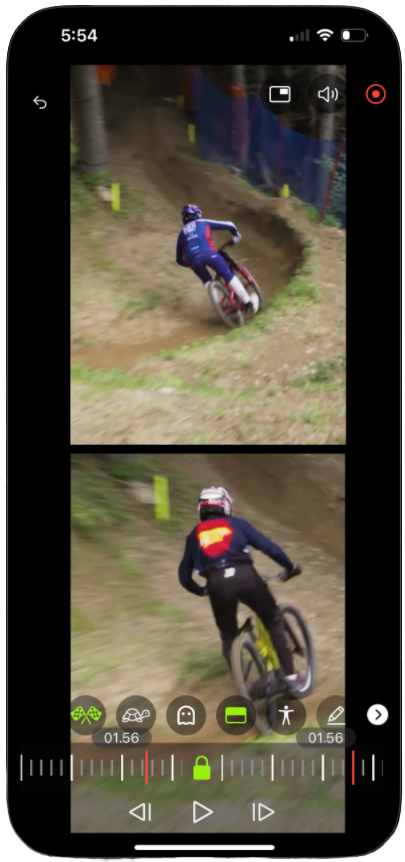
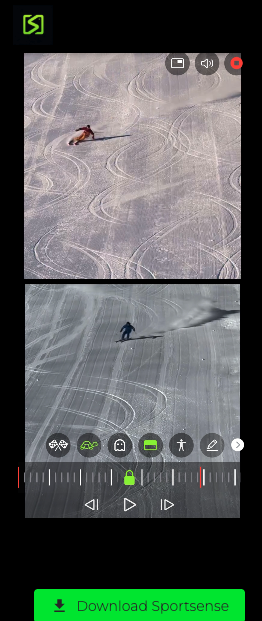
Compare, Race Time & Ghost Mode
Compare videos by selecting the black and white square in the menu.
- Once comparing, select RaceTime (racing flags) to line up two clips and compare their times, showing who was faster with an interval (e.g. +0.5 s).
- This works best when comparing two clips with a common point to point.
- You can also see the clip duration while cropping.
Ghost Mode is another comparison type, and can be selected while using compare or RaceTime.
- This method of comparison works best with fixed cameras, or head / body tracking of the athlete.
- Ghost mode is useful for super direct comparisons of technique.
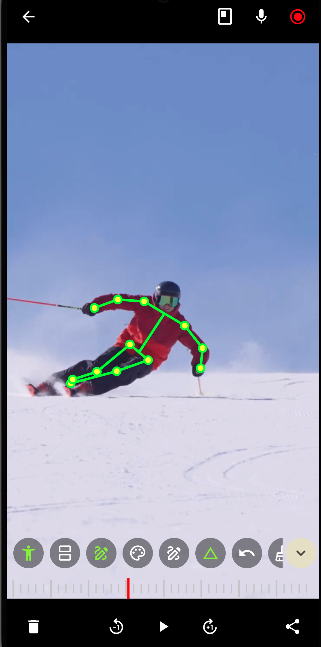
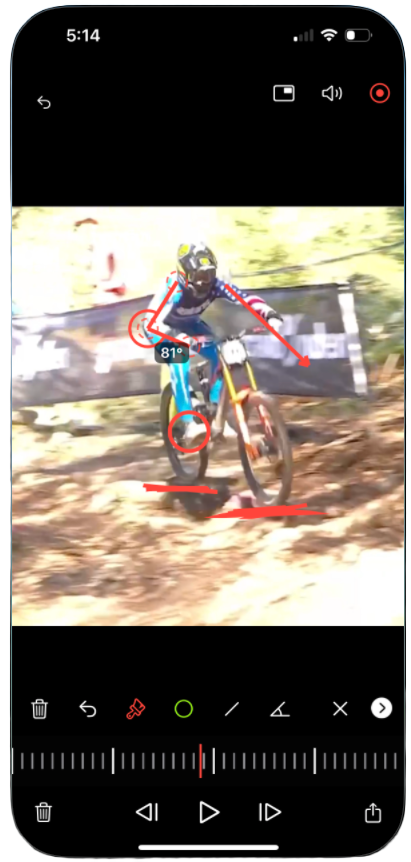
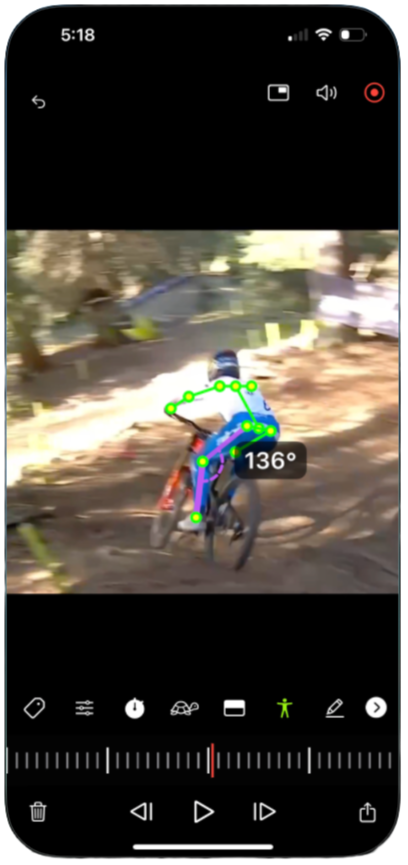
Annotations, Angles & Skeleton
- Simply draw on the video to annotate.
- The annotations menu has multiple options for drawing. If you make a mistake, select the back arrow on the far left of the draw menu.
- Exit the draw menu and the annotations will disappear.
- Skeleton (ball and stick model) is an excellent tool for frame by frame and slow-mo analysis.
- Tap again for the Center of Gravity tracker.
- To identify angles use the angle draw function in the annotations menu OR tap two segments of the skeleton to quickly compare an angle around a joint.
Sharing.
Record coaching feedback, share videos, create feeds, invite athletes, and manage your coaching content.
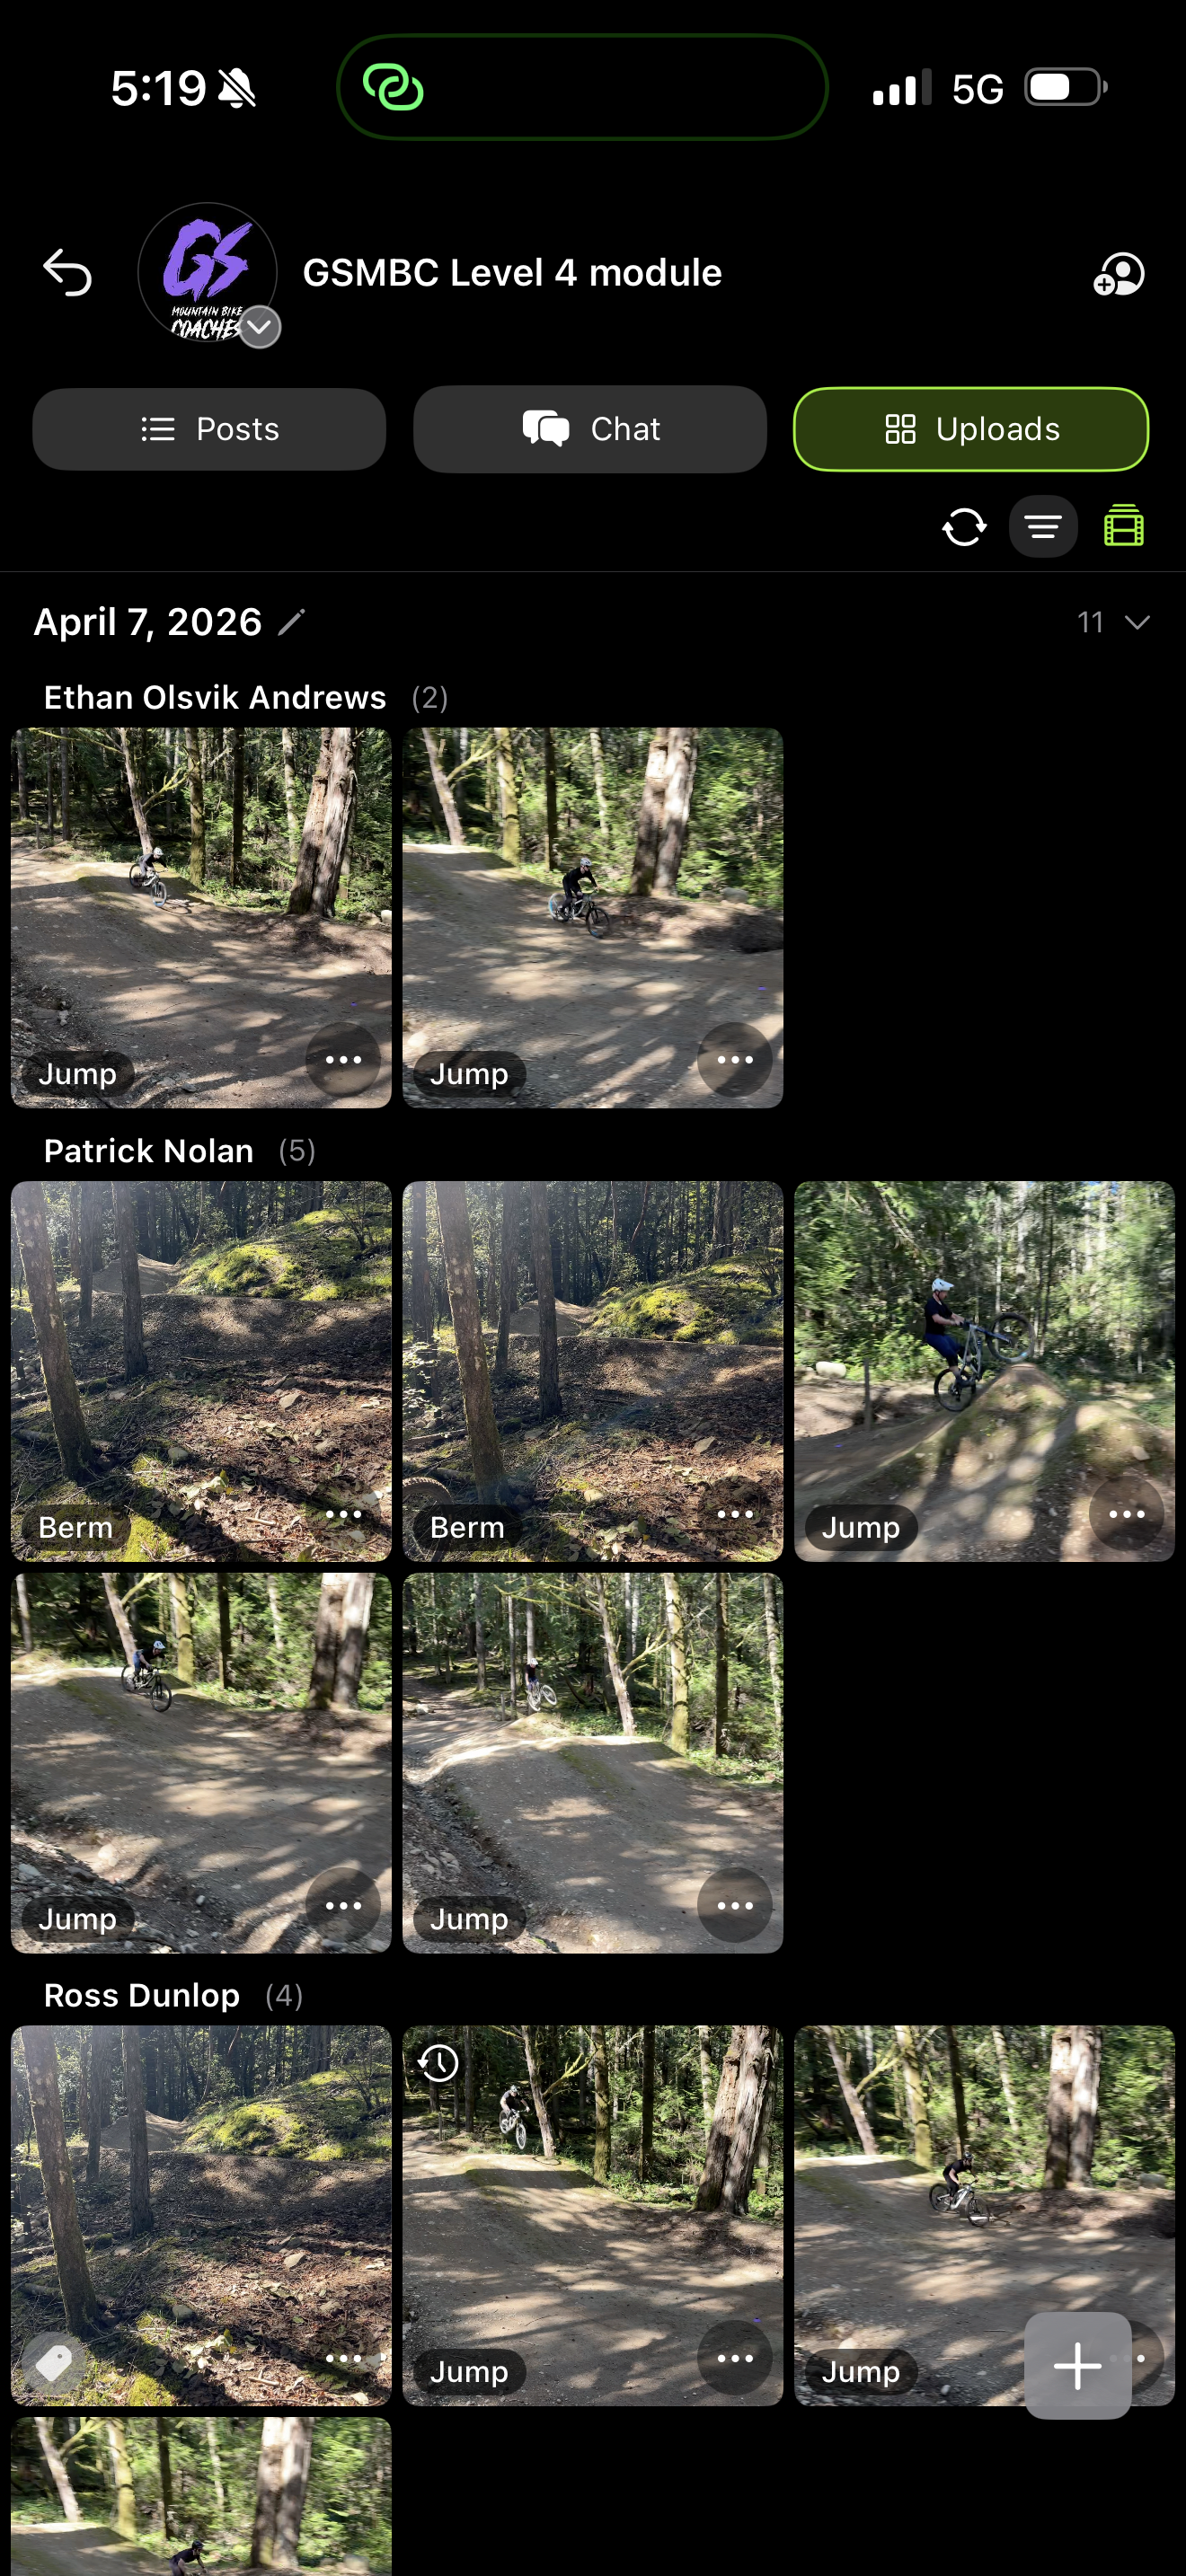
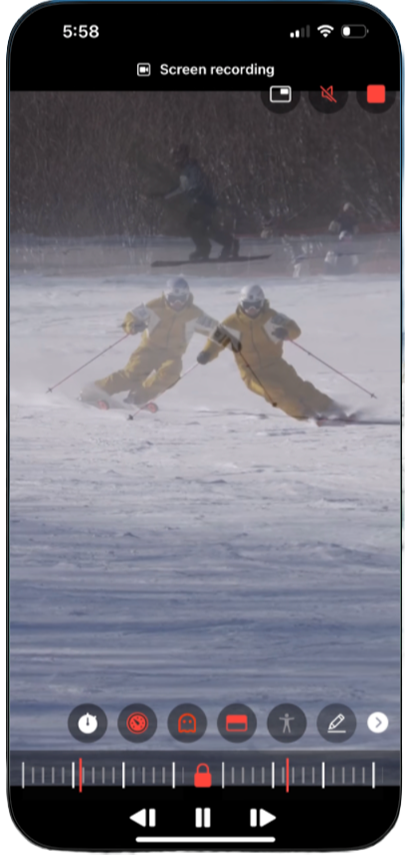
Capture & Auto-Organize
As you film, call out who is in the clip and what they are working on. sportsense transcribes your voice and tags and files every video automatically, so your library organizes itself.
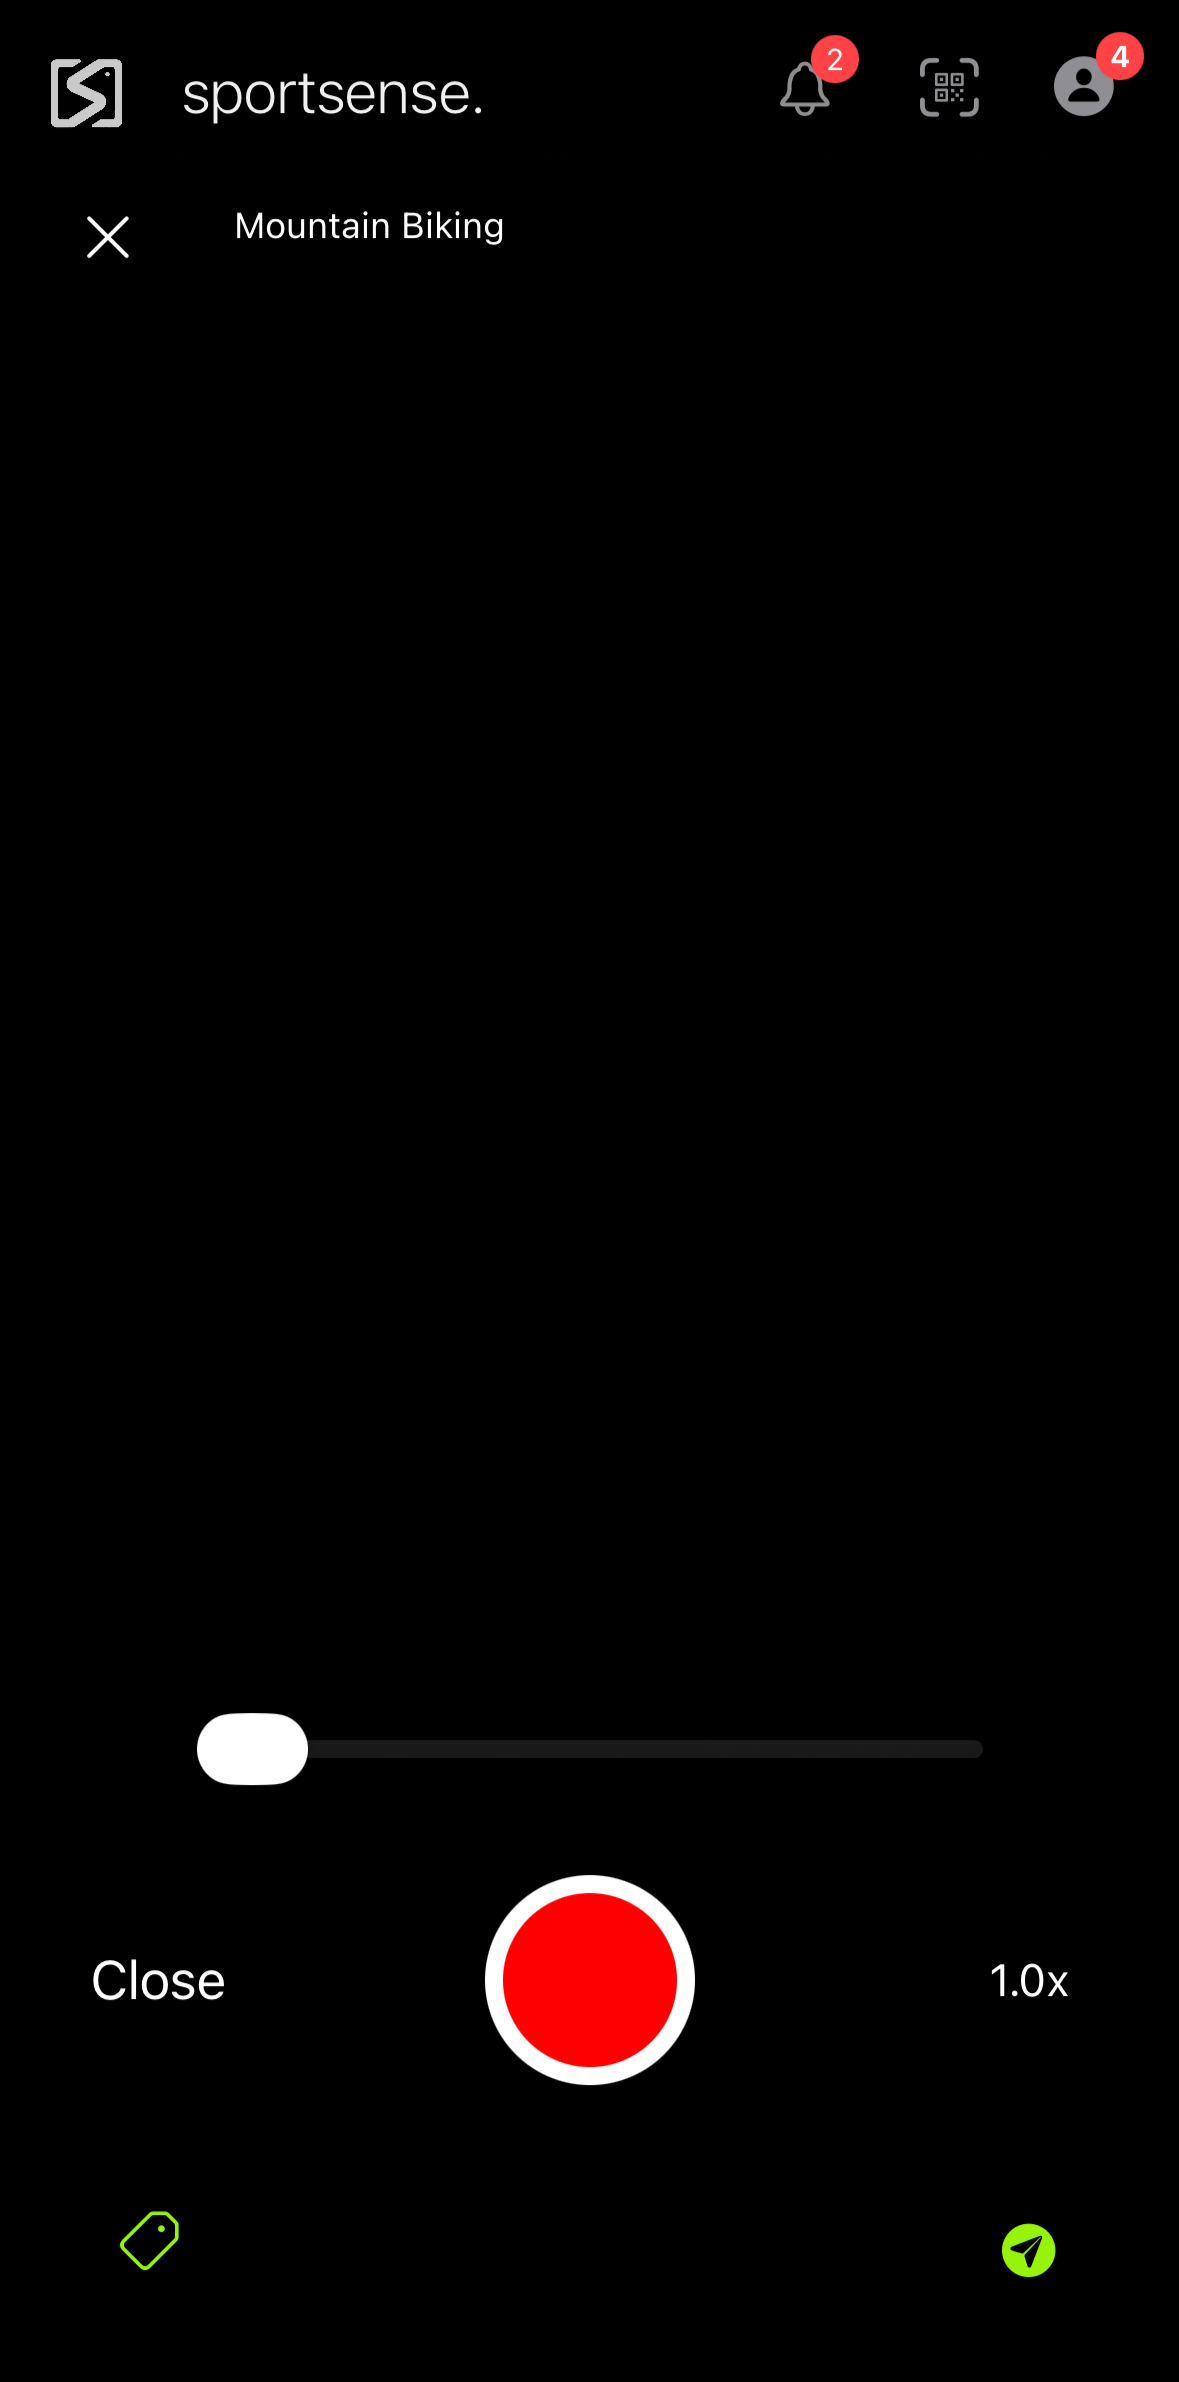
- Record with the sportsense camera and say the athlete's name and the skill while you film, for example "Alex, cornering."
- On the camera, the green arrow (bottom right) chooses the feed to send to, the tag icon (bottom left) opens the tags, and the mic captures your voice.
- When you post, the app auto-tags the actions and users from your audio and files the clip by athlete, skill, and date.
- Anything it cannot place lands in an Untagged group, so it is quick to tidy up later.
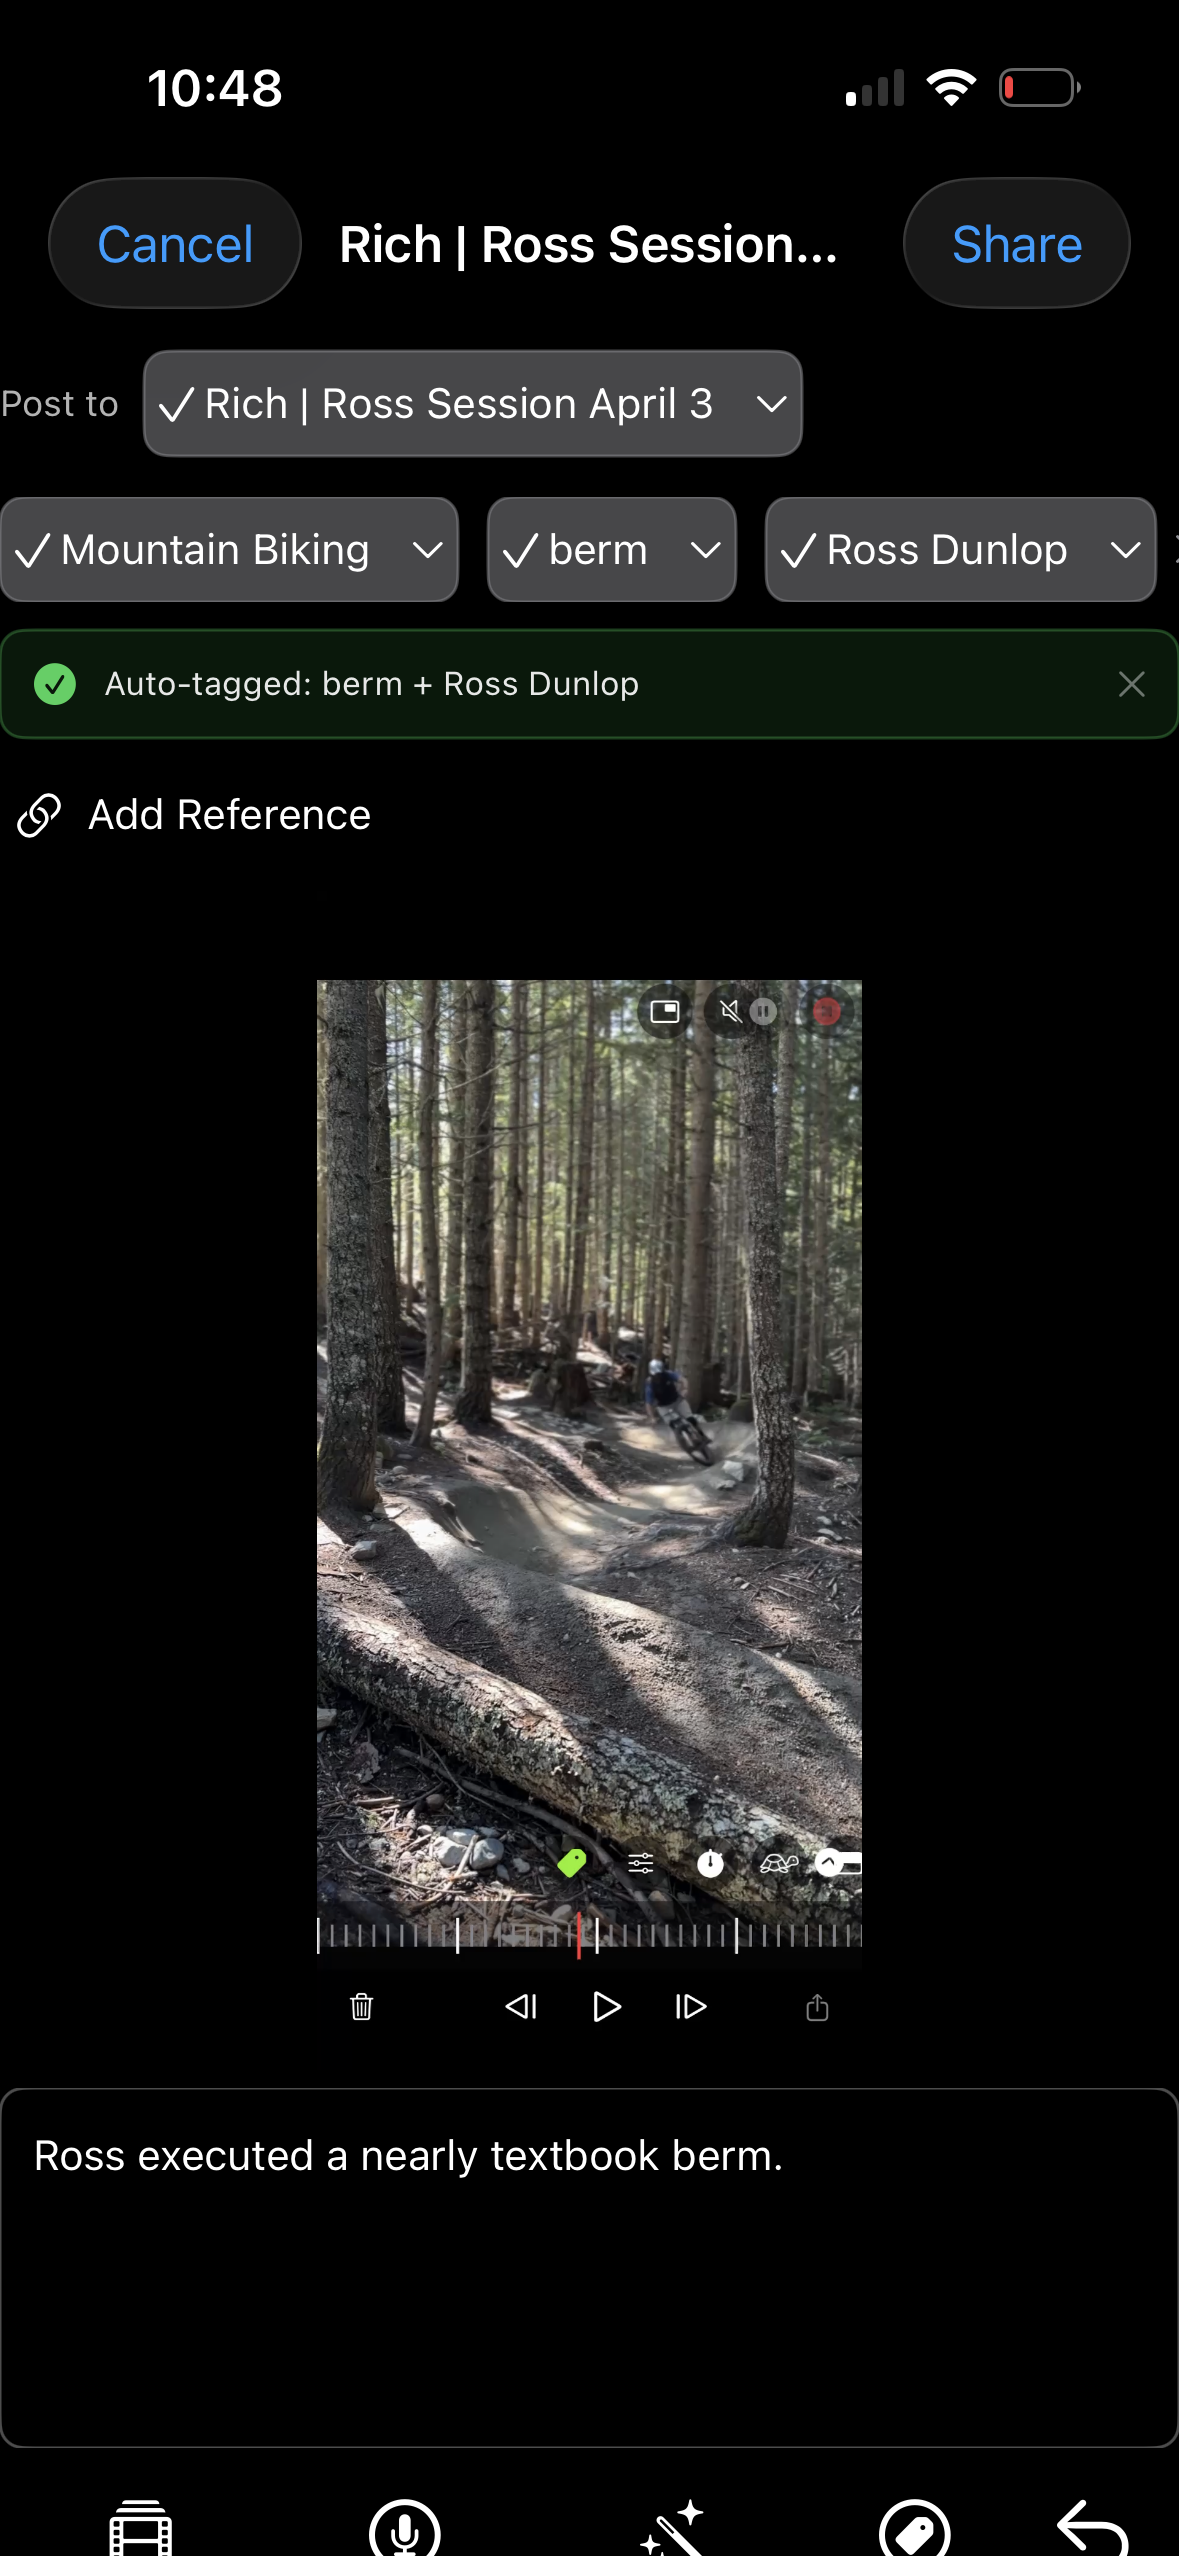
Record Coaching Feedback
- Select Record in the top right corner of the analyzer to capture your screen and voice as you break the clip down.
- Record was designed to package feedback. Talk through what you see, draw, and demonstrate, and it is all captured in one clip.
- When you stop, sportsense files the clip to the feed with a transcript and a written summary of your key points alongside the video.
- If you haven't created a feed yet, skip to the Creating / Editing a Feed section below for a walkthrough.
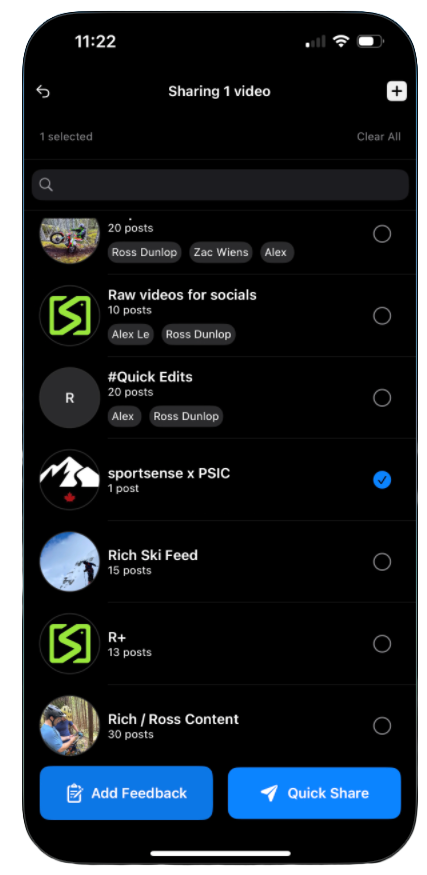
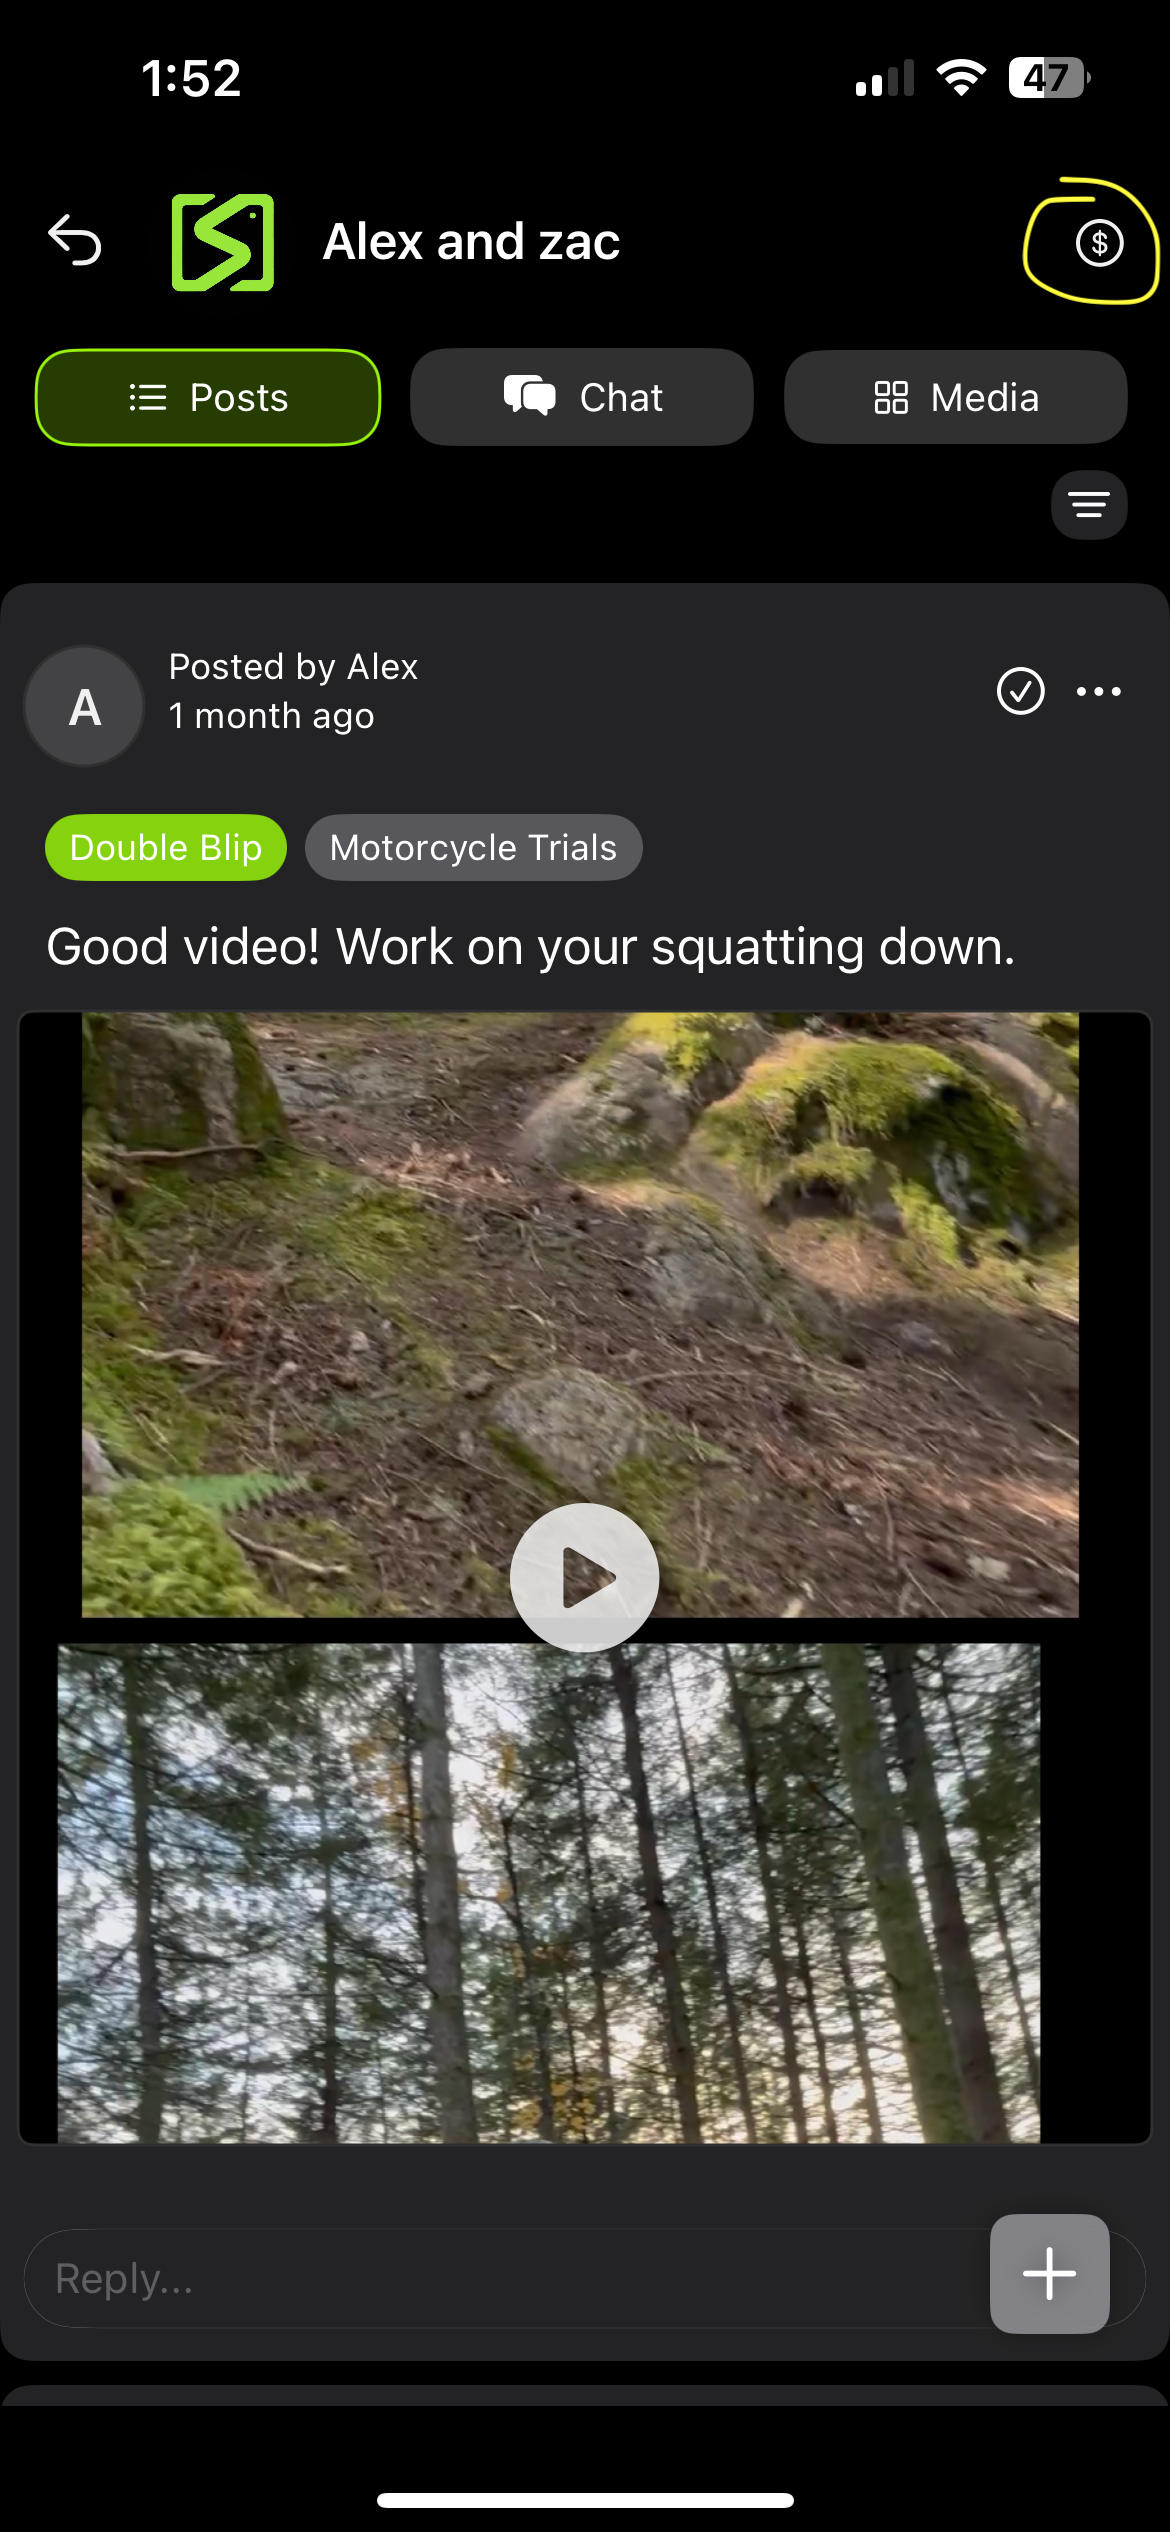
Sharing Videos
There are several ways to share videos in sportsense:
- From the Analyzer: Once you have recorded feedback, the app will open up share. Choose a feed you would like to share to. If you don't have any feeds, select the + in the top right.
- Direct from the Library: Long press on a video, and select share in the bottom left.
- Within a Feed: Tap the chat button and tap the attach button in the bottom right when in a feed.

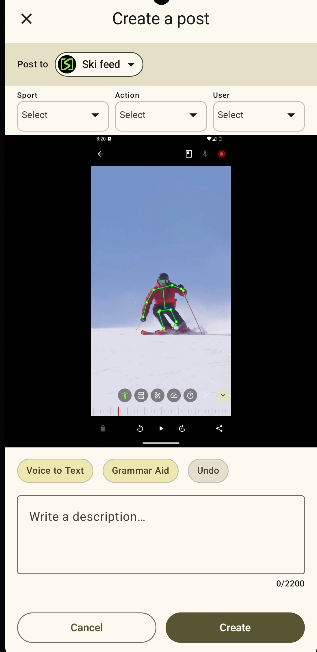
Feedback (Posting)
- When posting to a feed, select Add Feedback.
- Adding feedback allows you to make final edits to the video, and write or transcribe a description for the post.
- Actions and users are tagged with your voice or audio in the video.
- You can tag the sport of a video (automatically set if posting to a feed with a sport set already).
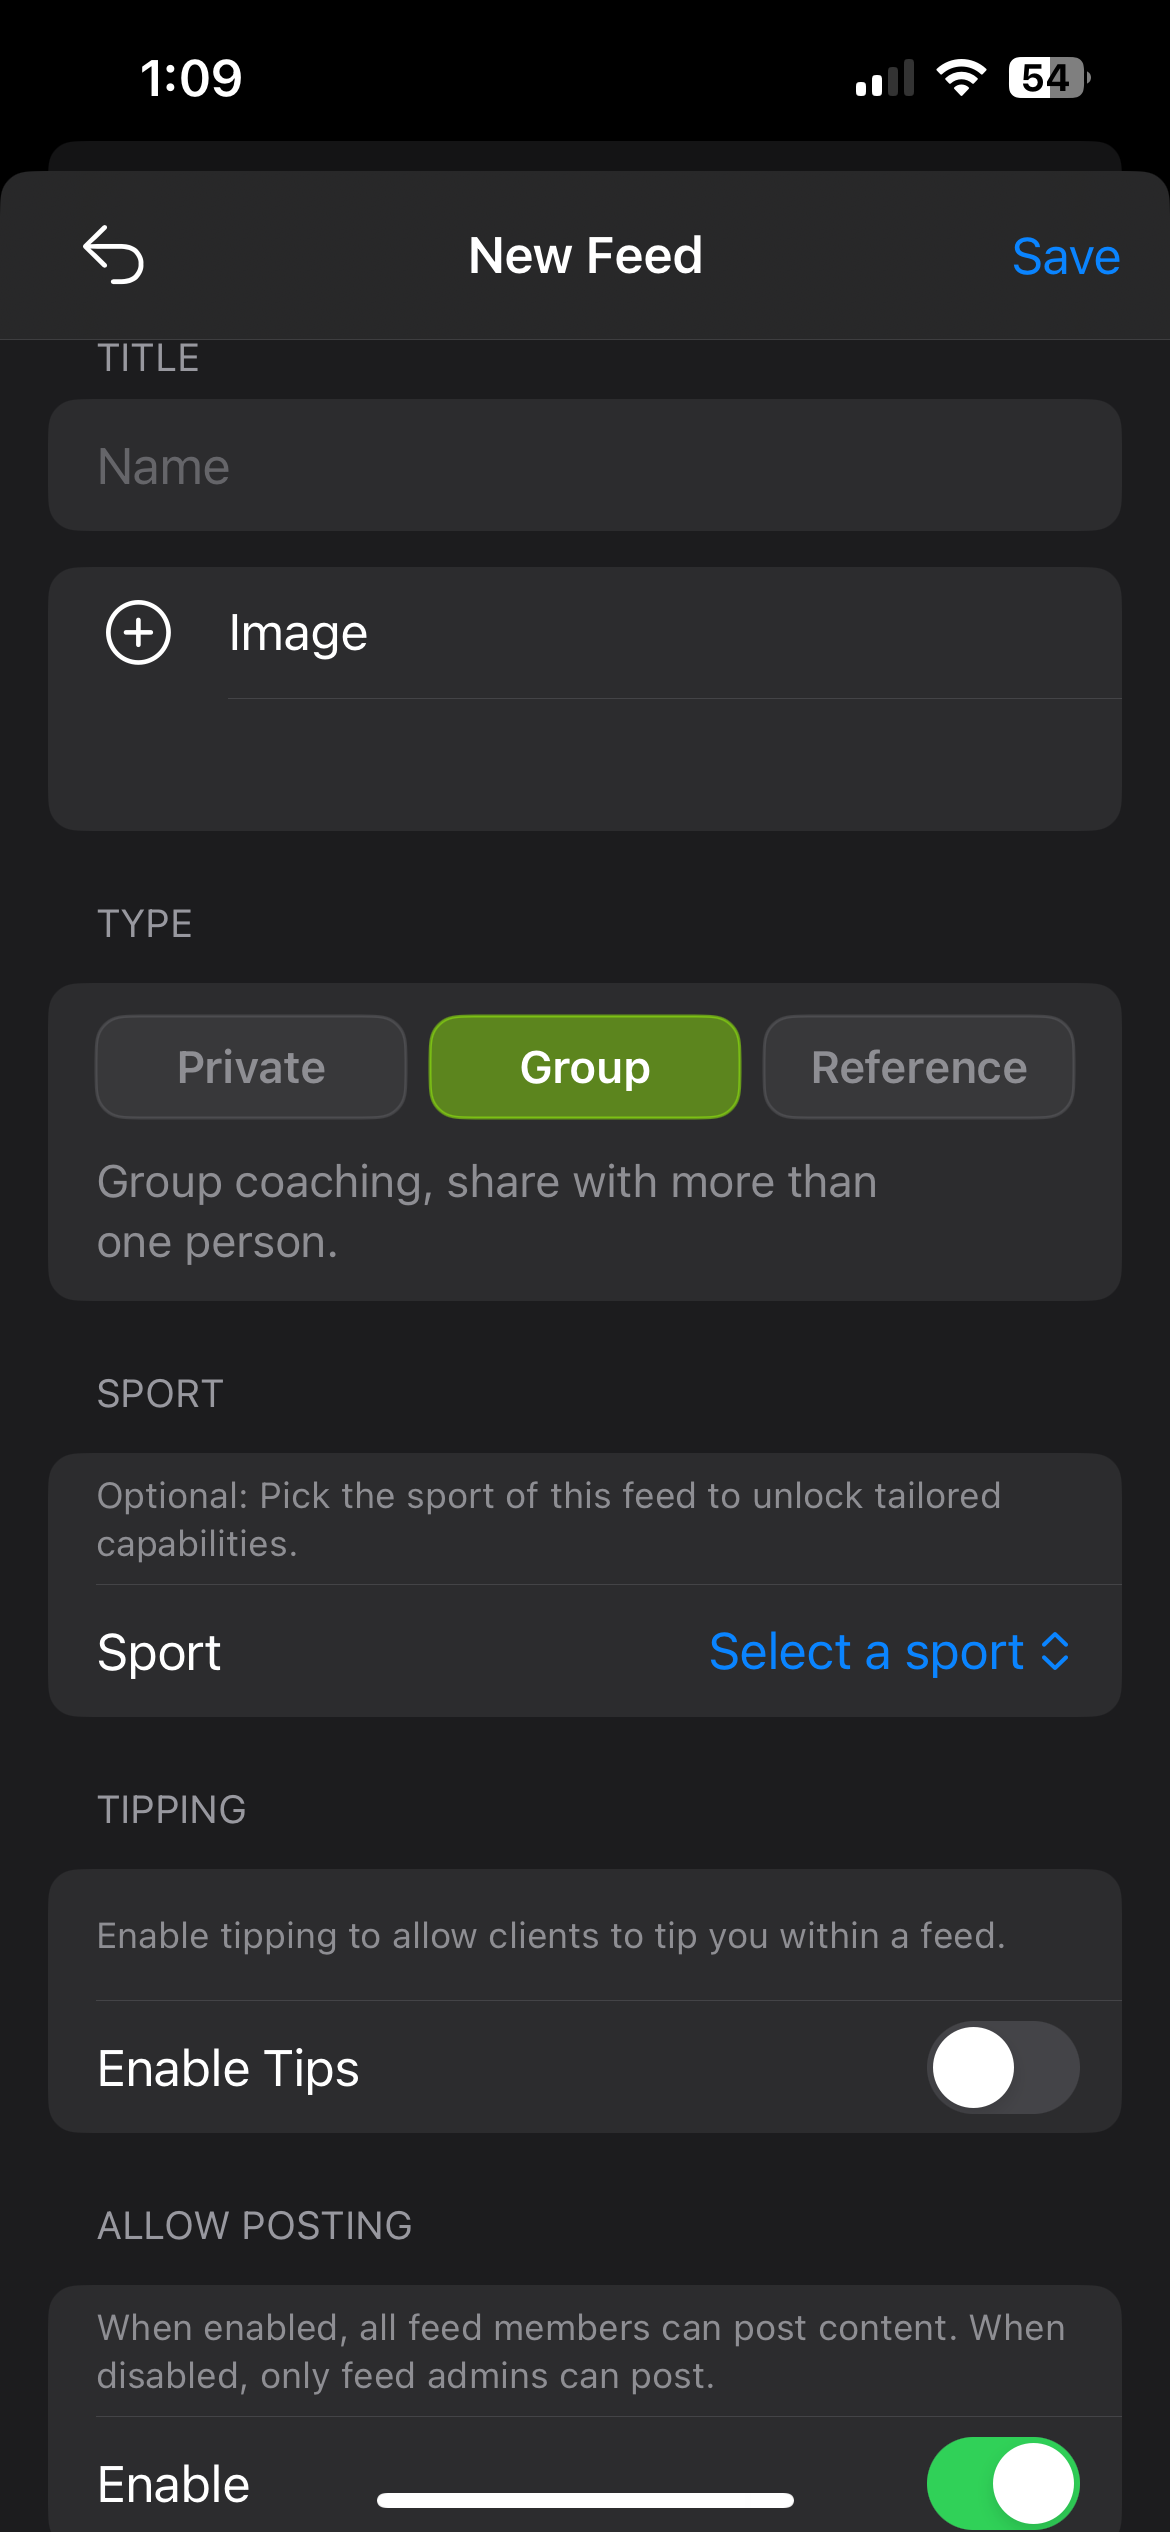
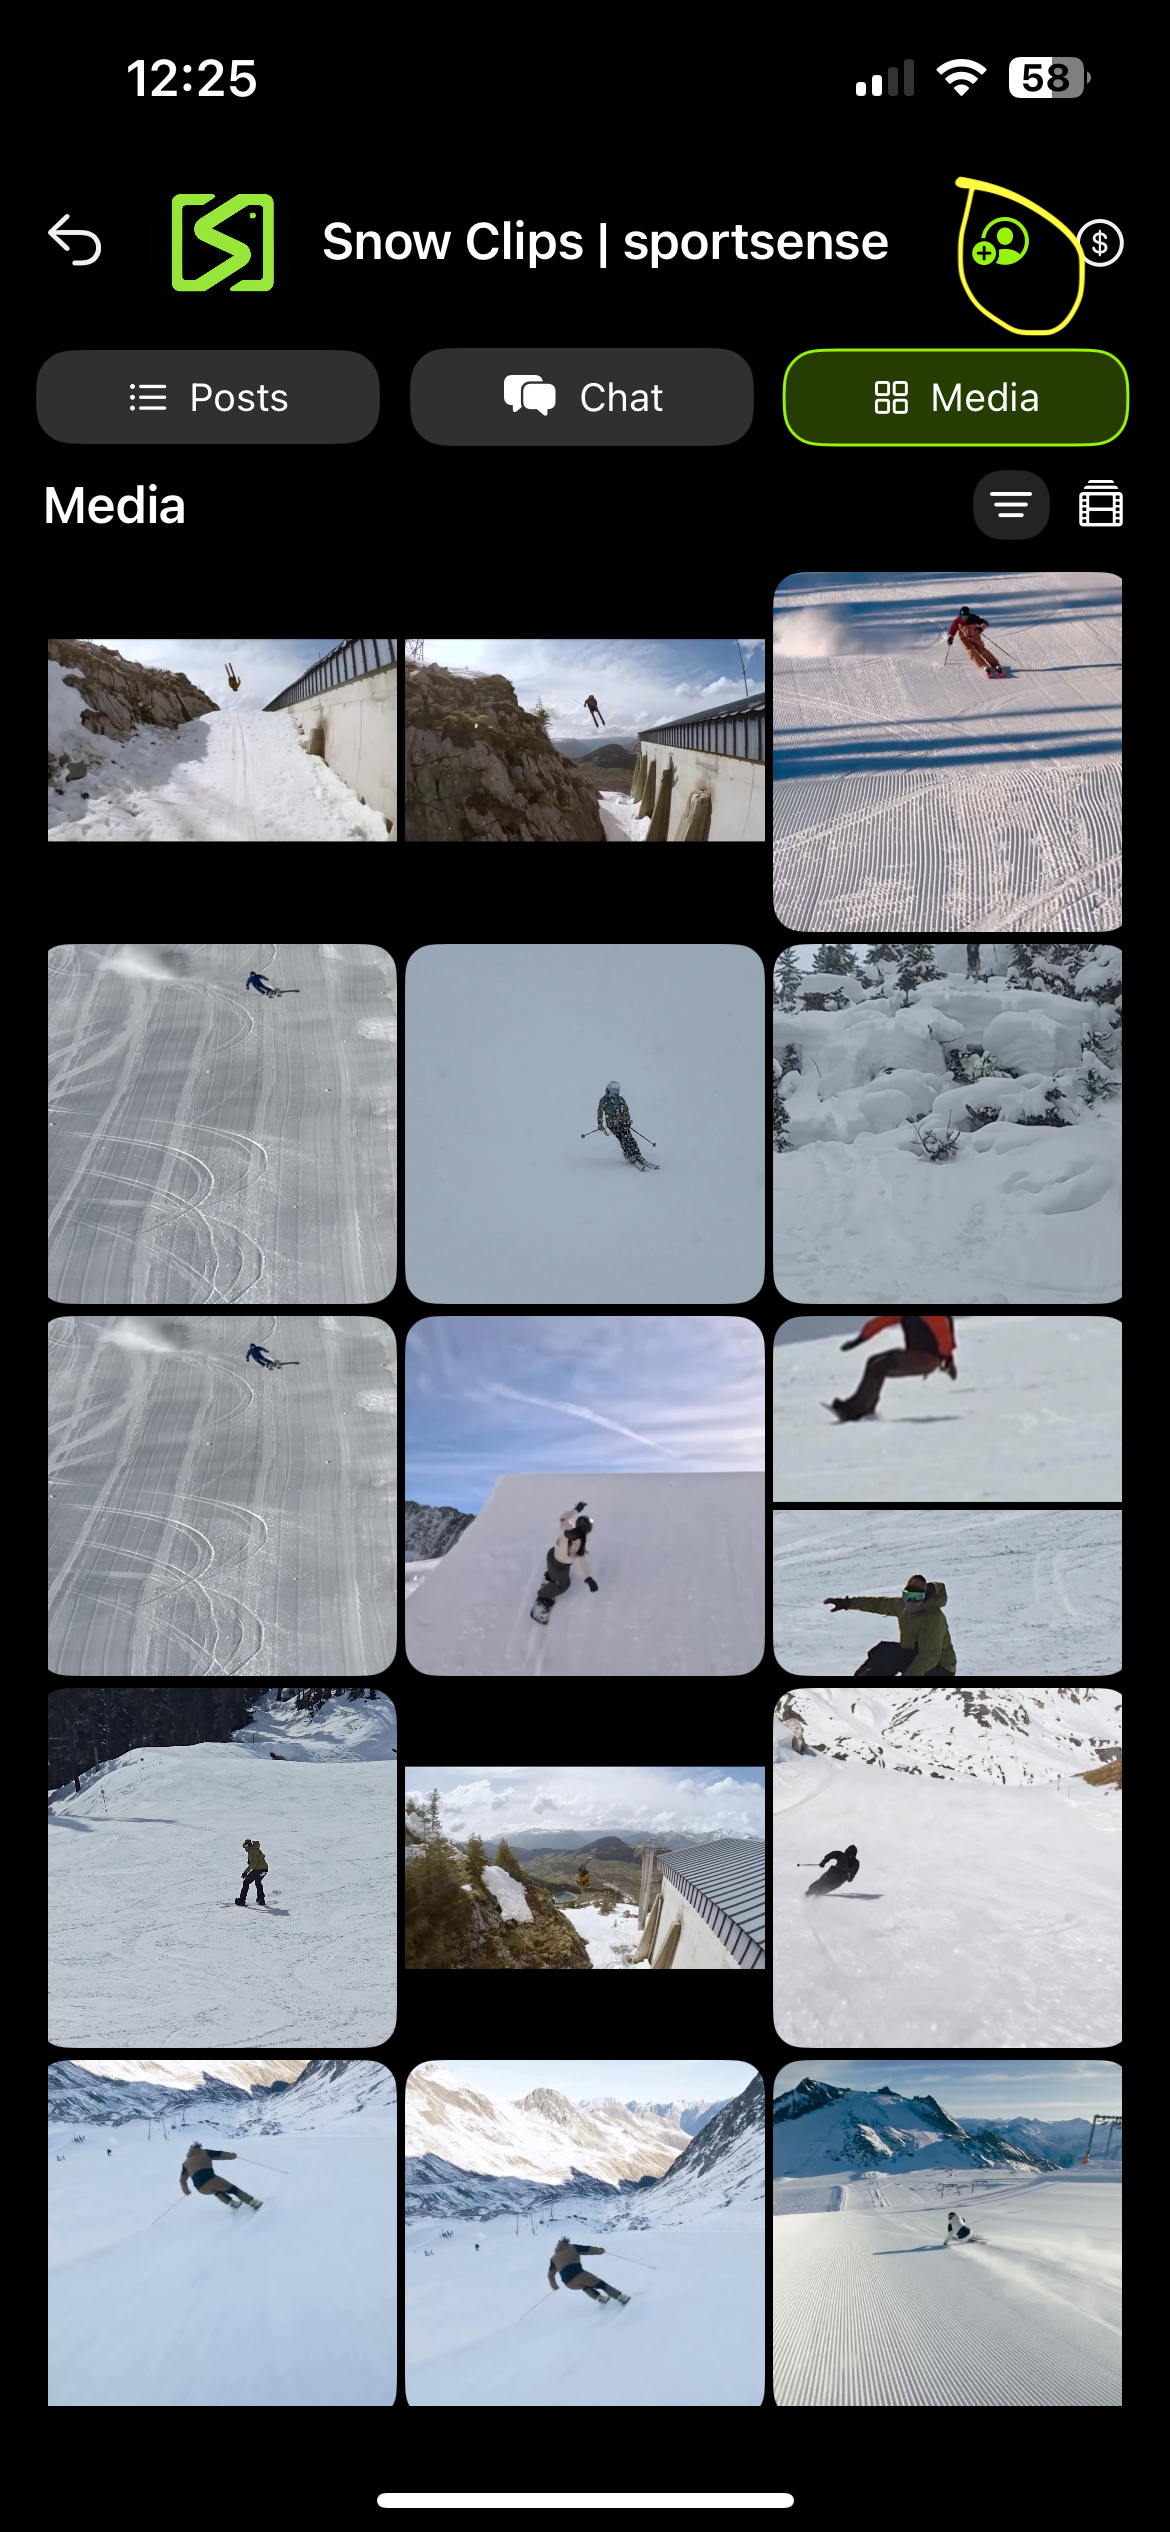
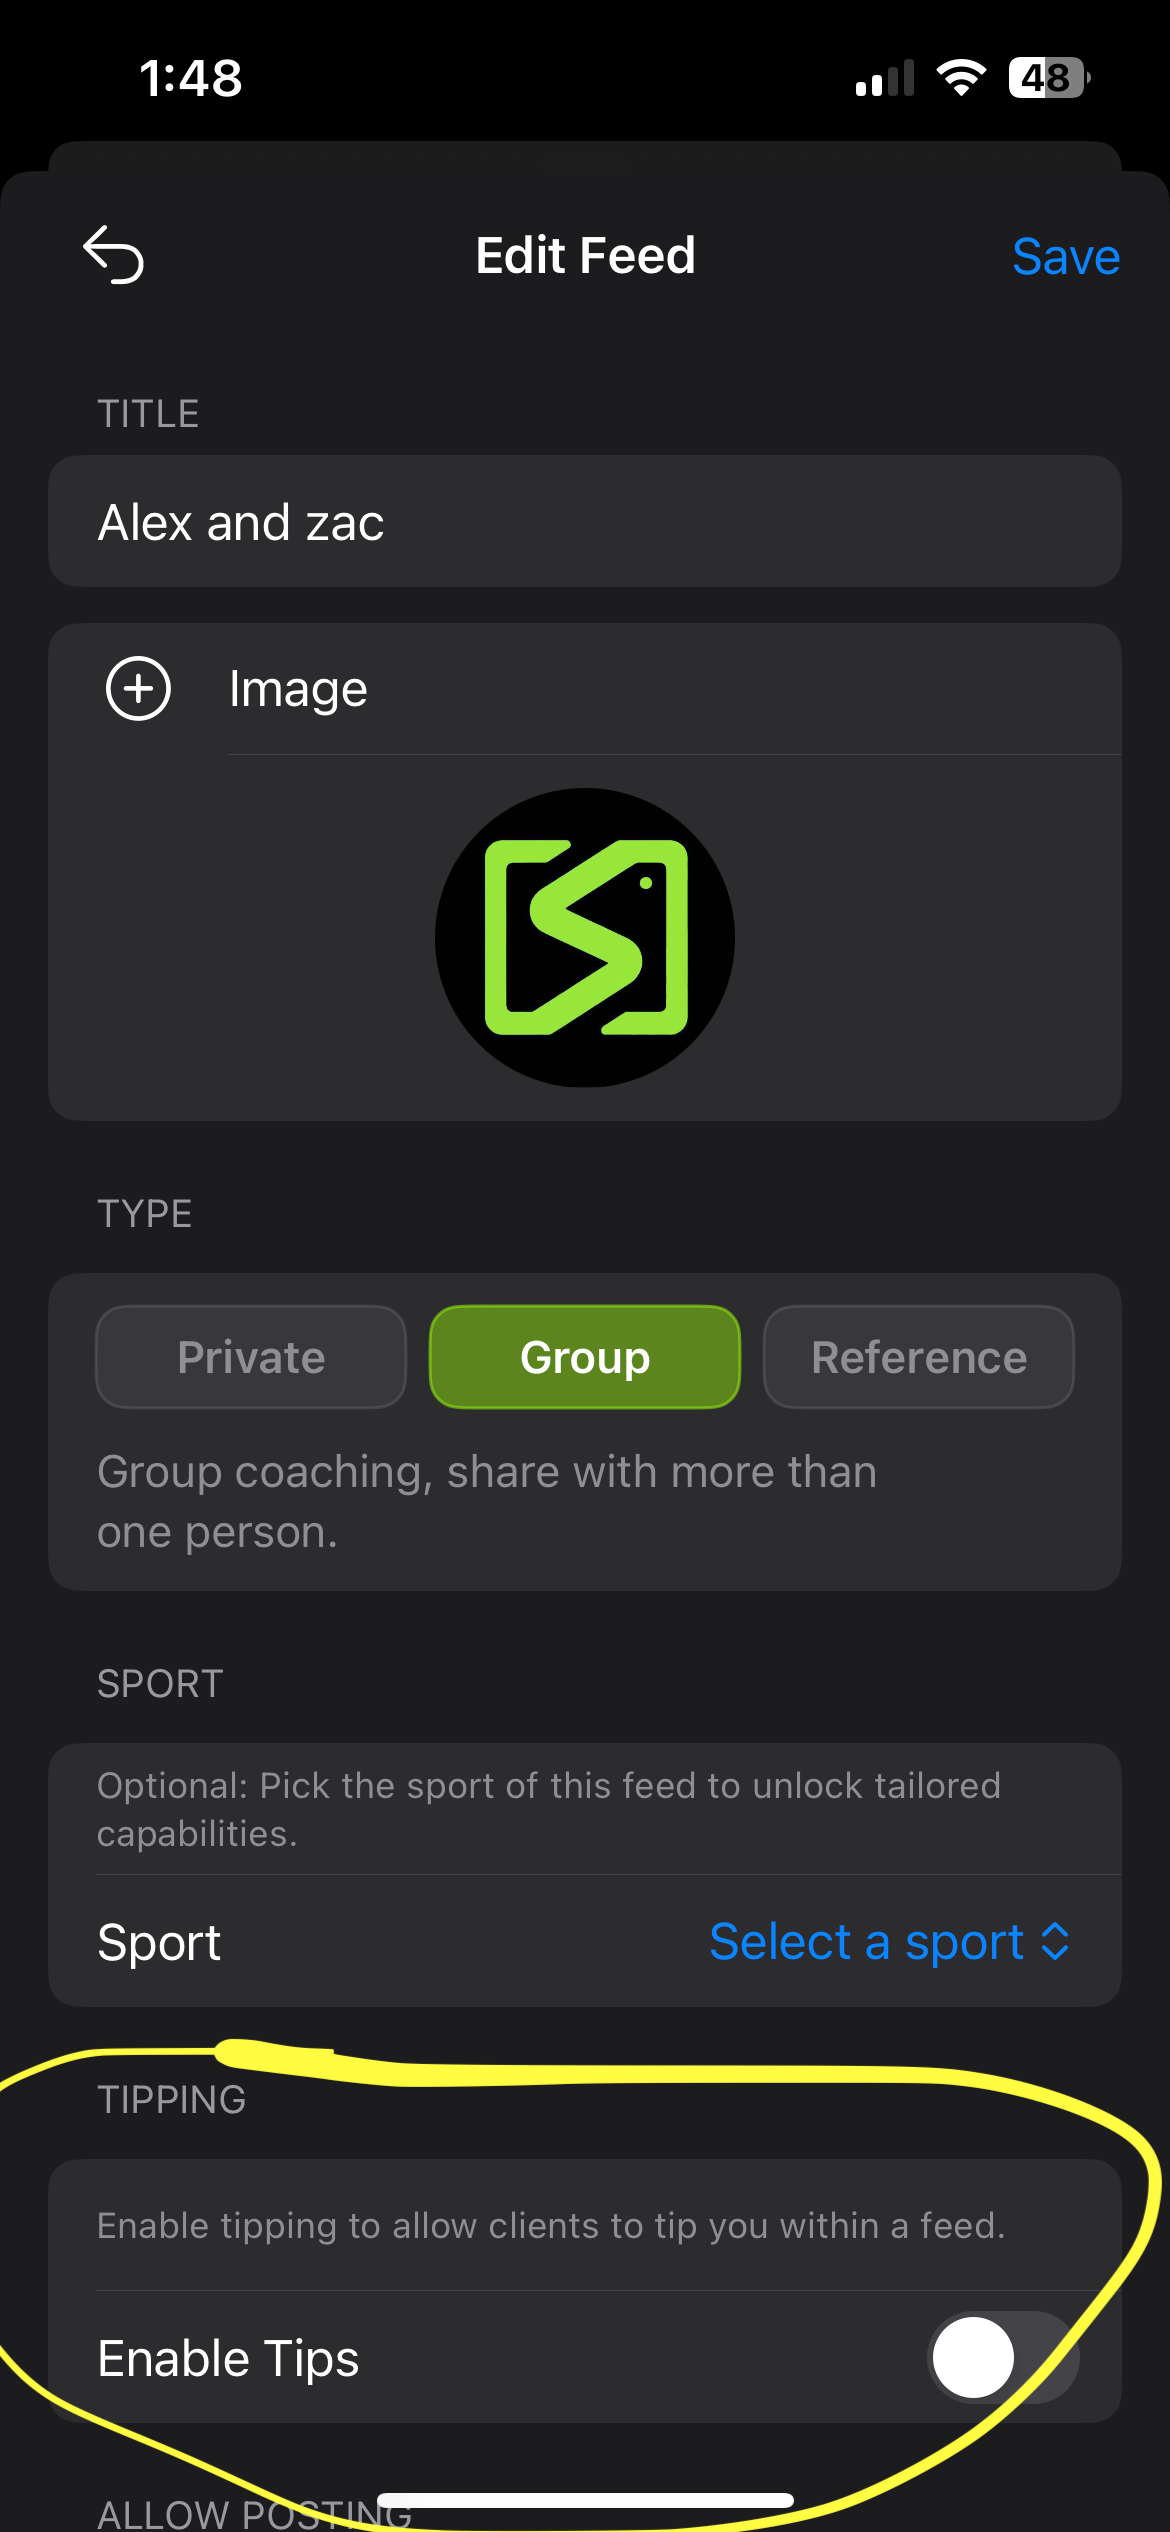
Creating / Editing a FeedPro
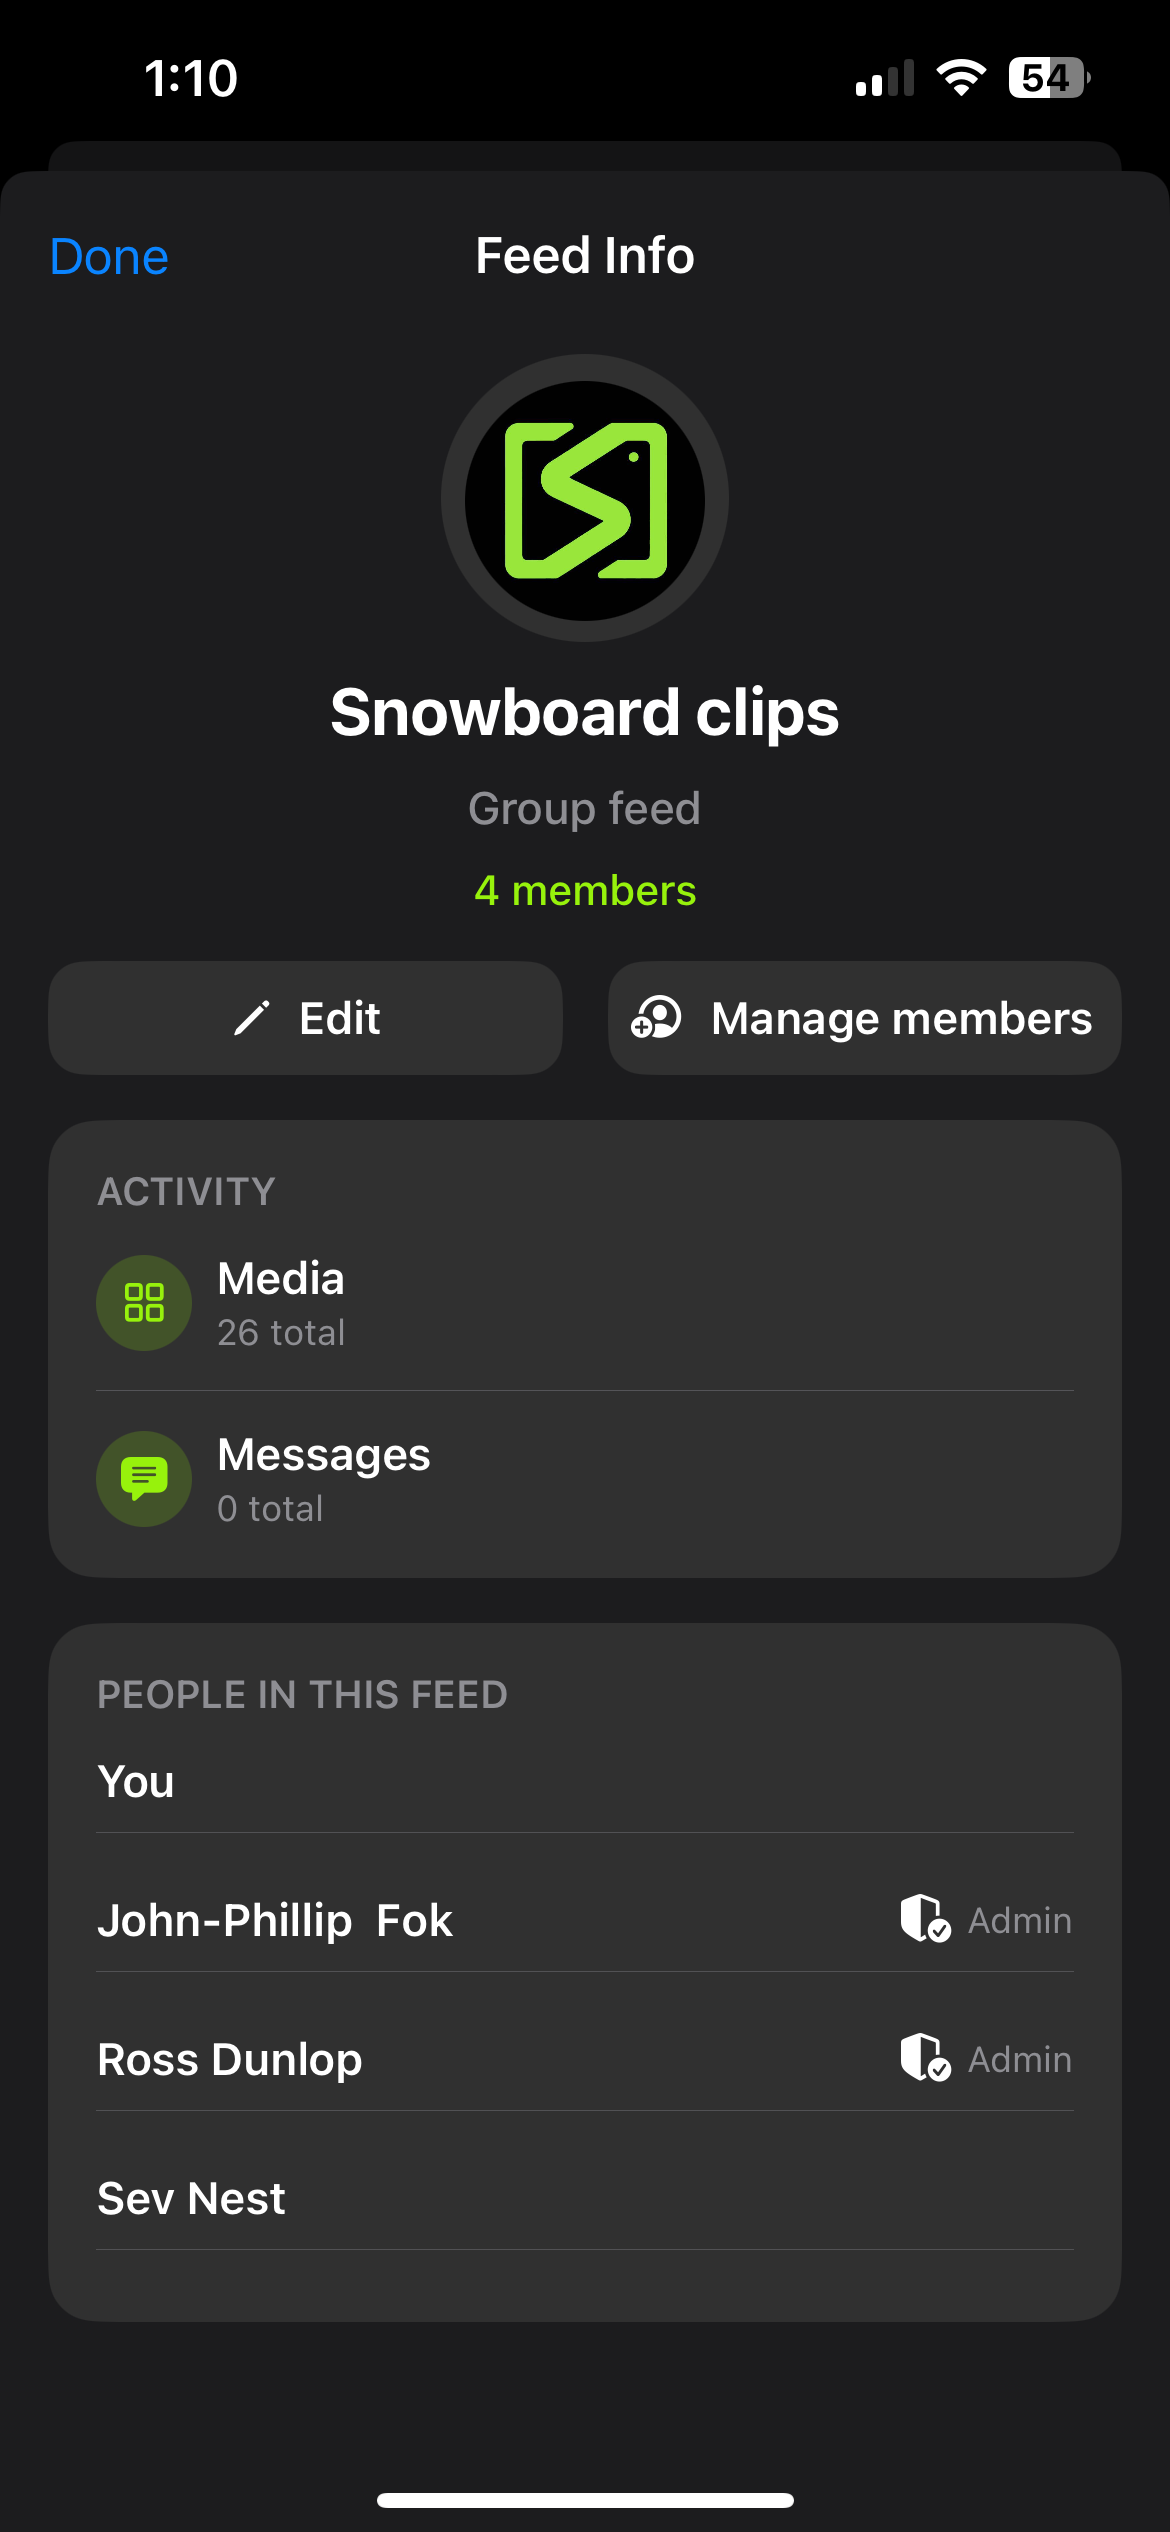
A feed is a private group where all video, feedback, messaging, and files are shared on the app. Feeds are used to share videos from an in-person coaching session, track progress over time, and coach athletes remotely with video.
- Create a feed in the share tab (top right plus button). Click on the feed title in a feed to edit.
- Anyone can create a private feed. Group feeds and reference feeds require a Pro license.
- Name the feeds, add an image to personalize.
- You can set a sport on a feed to unlock future features like suggested reels.
- Tips can be turned on if you have set up to receive payments in feed create/edit.
- You can disable posting for non-admins as well as toggle on/off the chat section of a feed.
- Your athletes/clients are always able to post to a feed, even without a license.
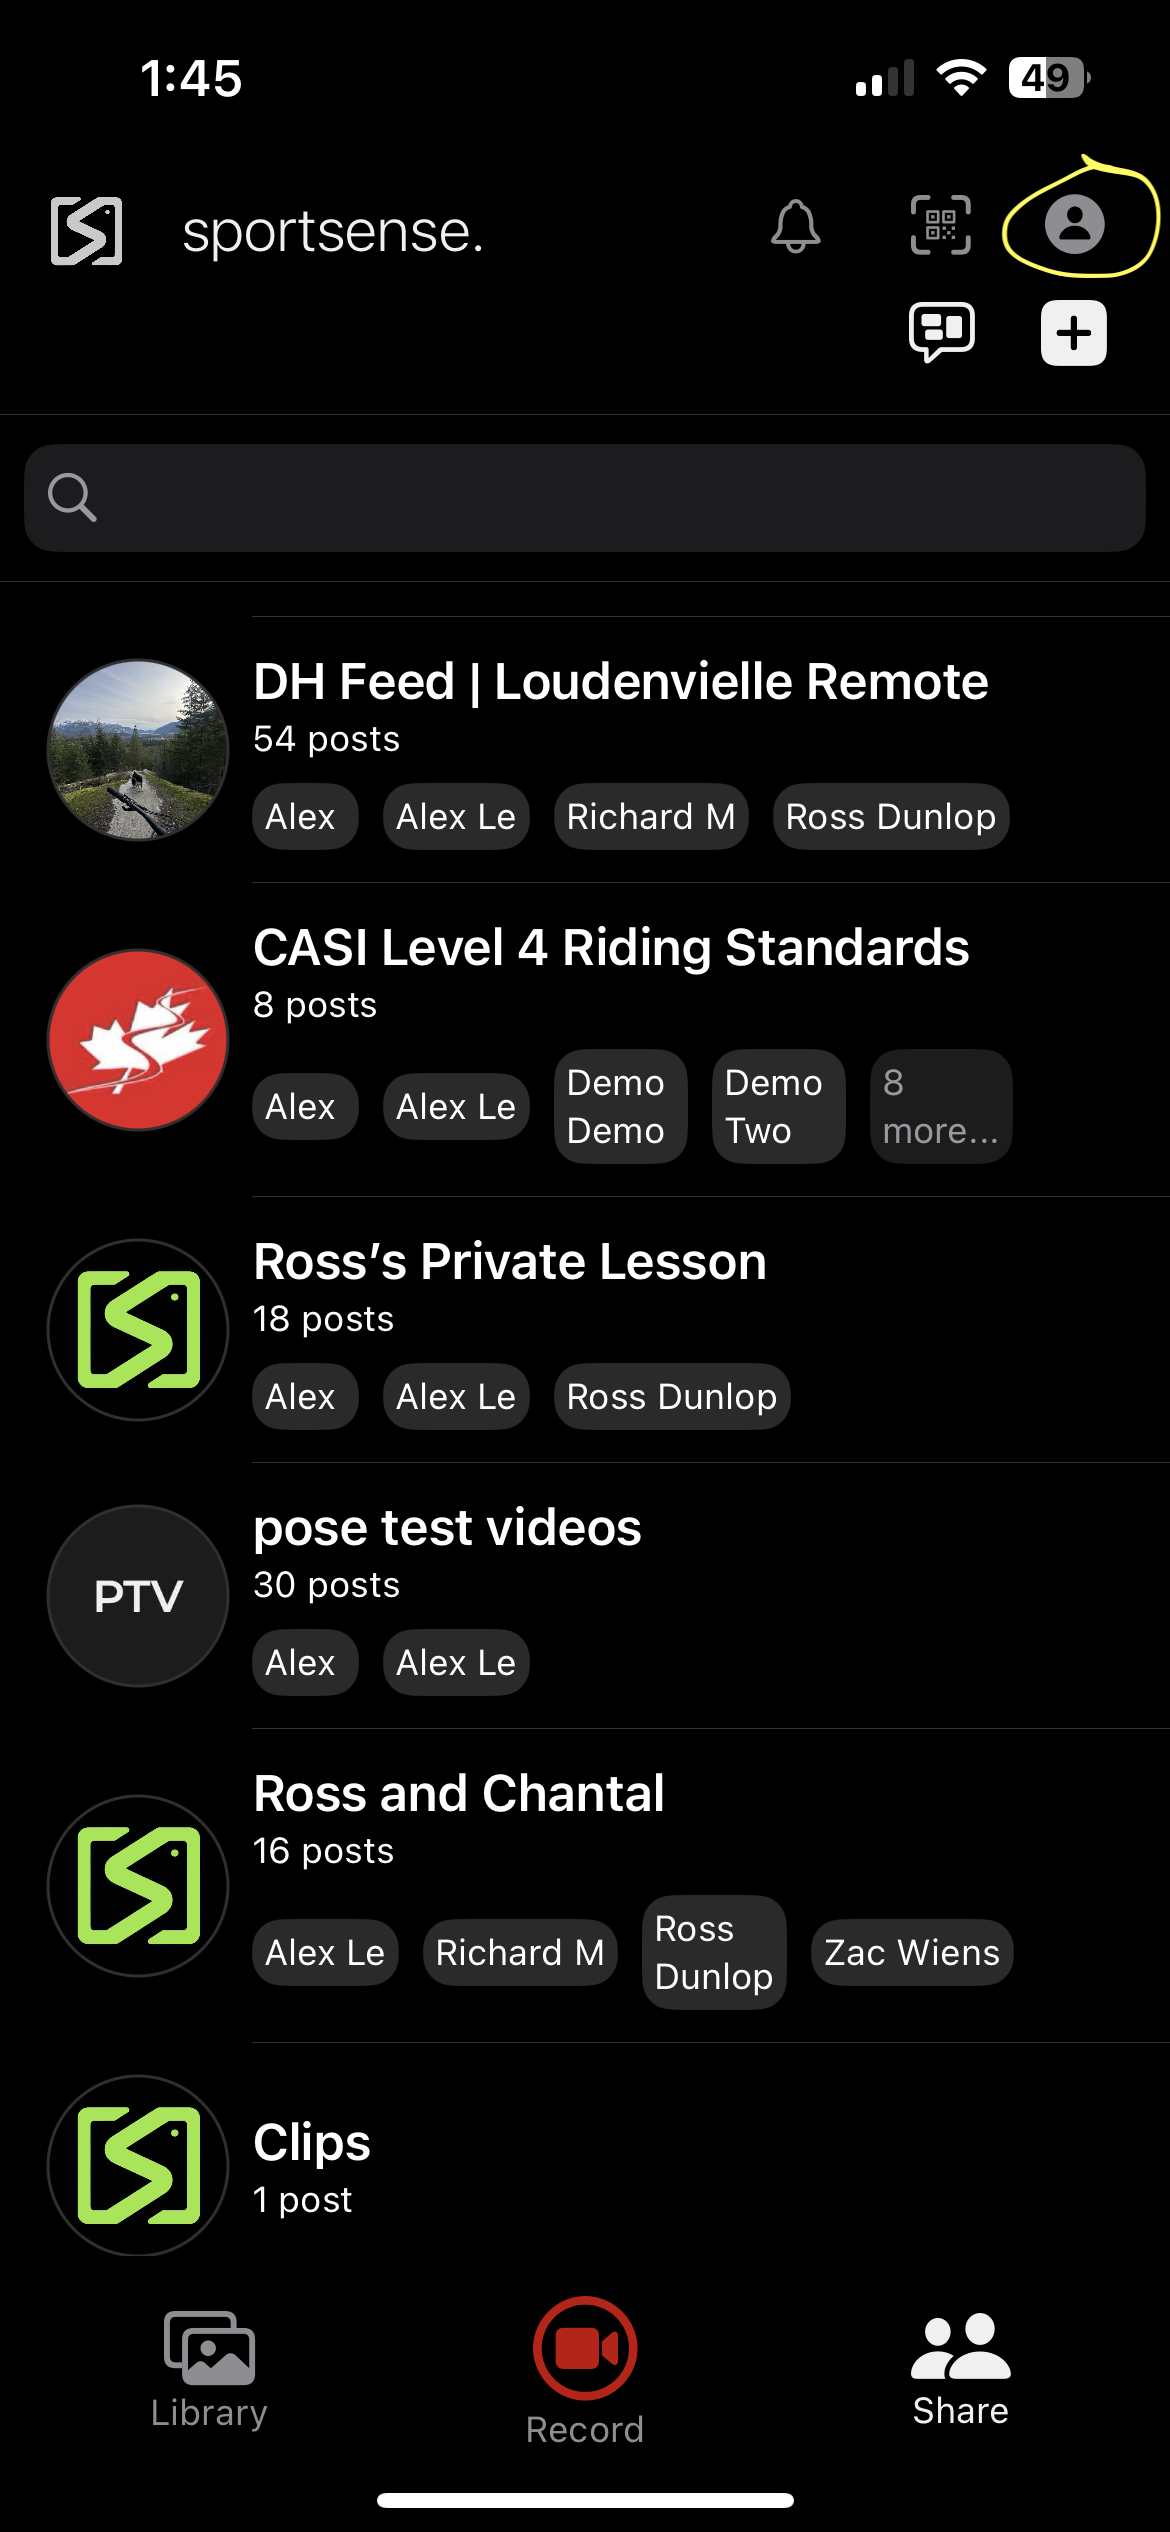
- Feeds will show up in the order of recent activity.
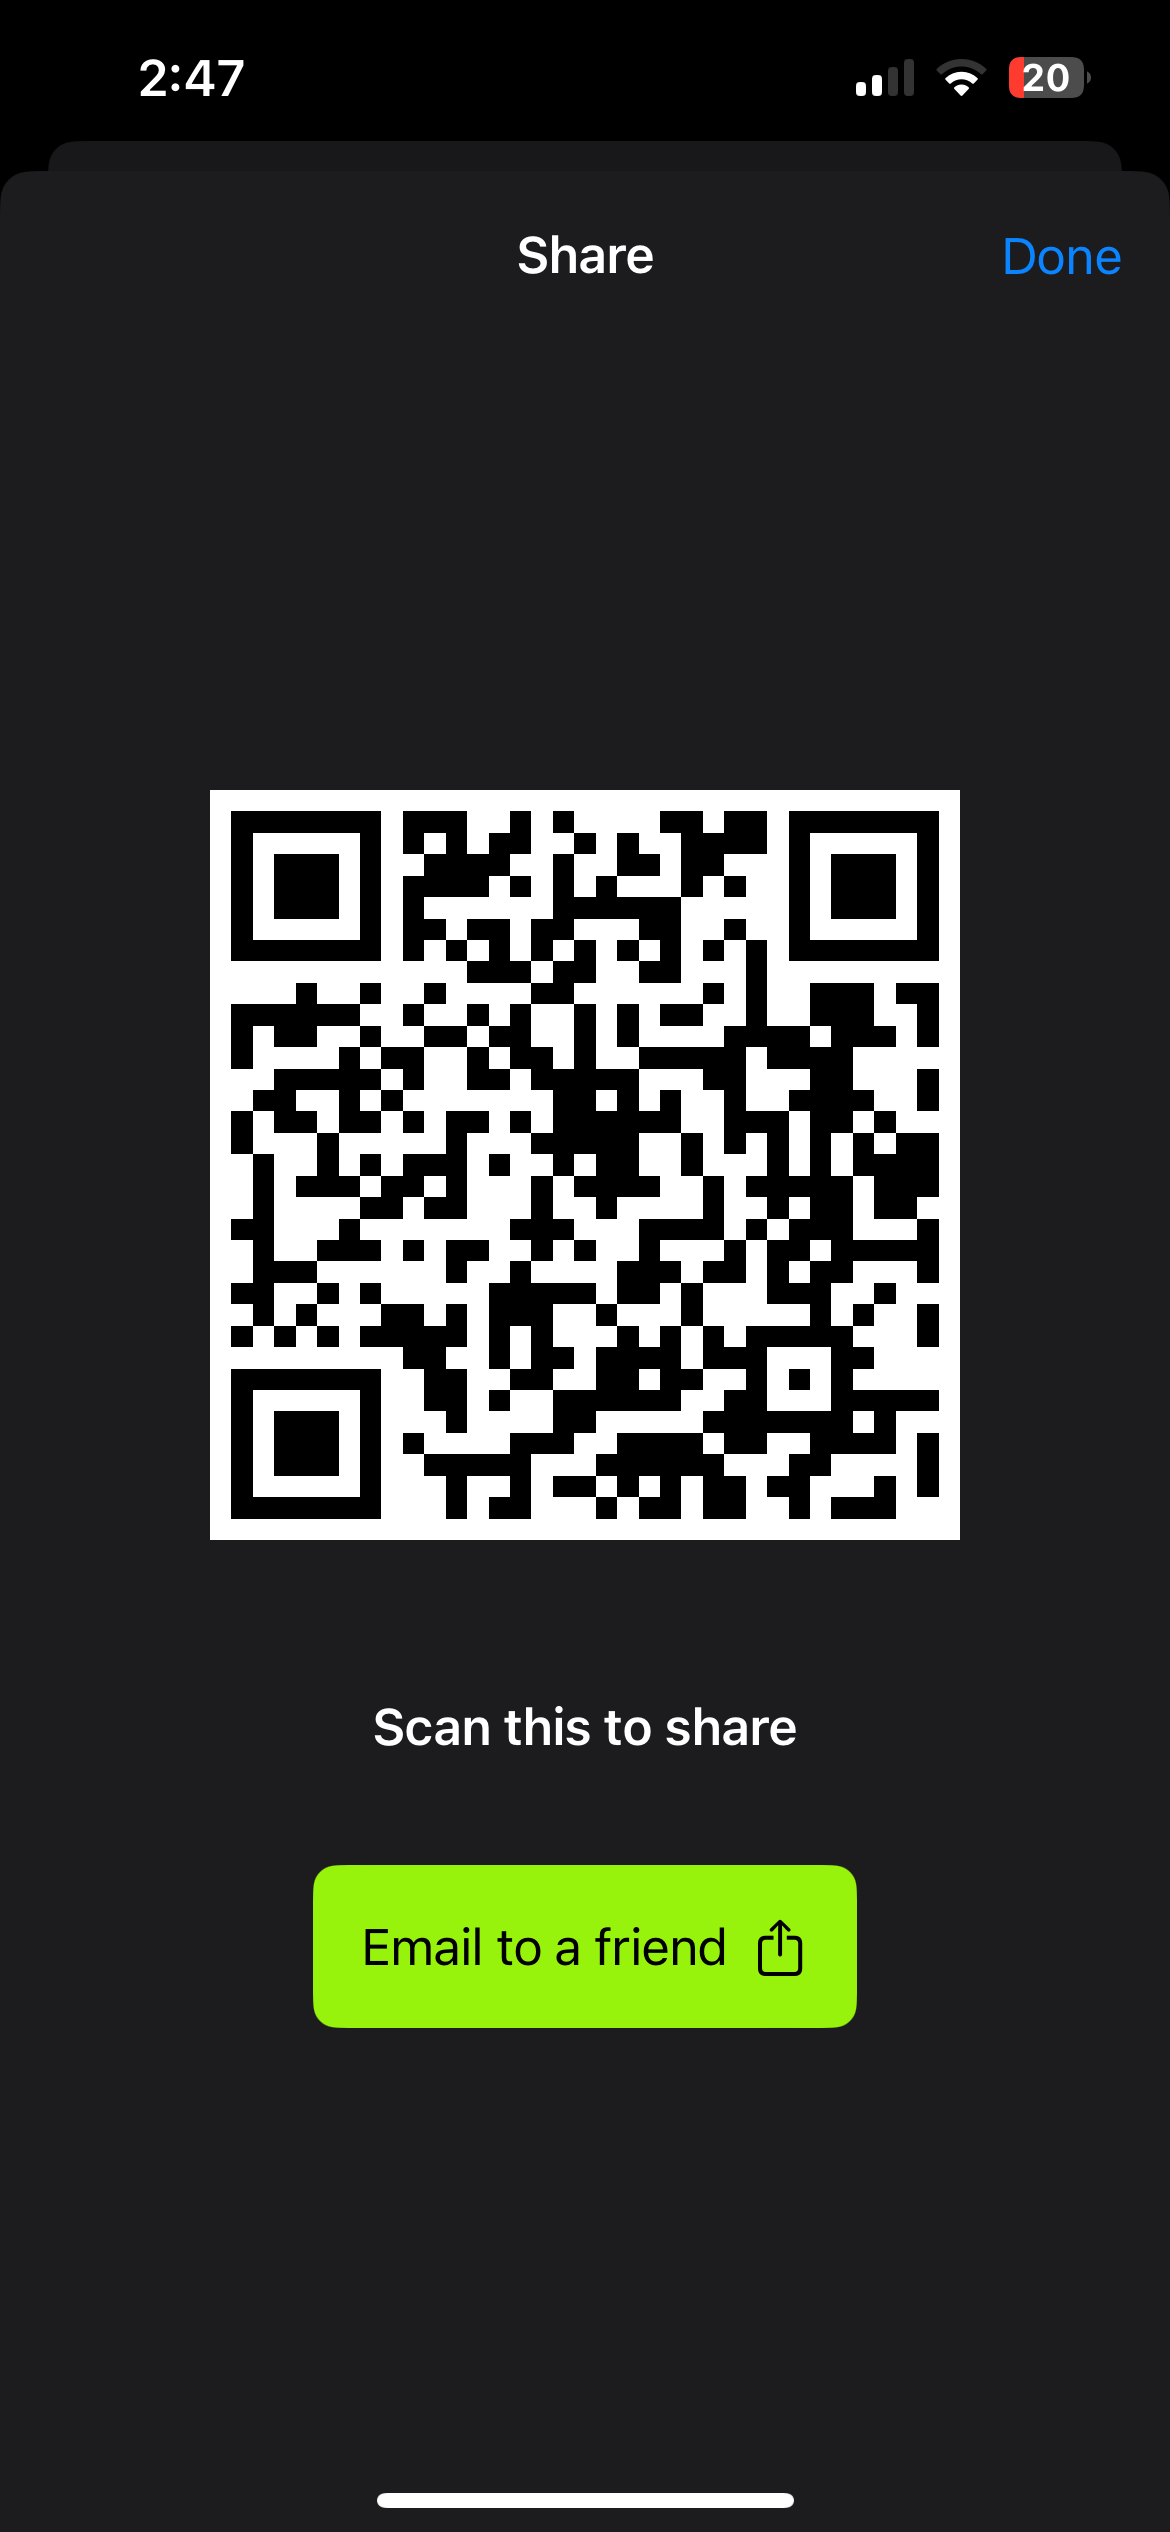
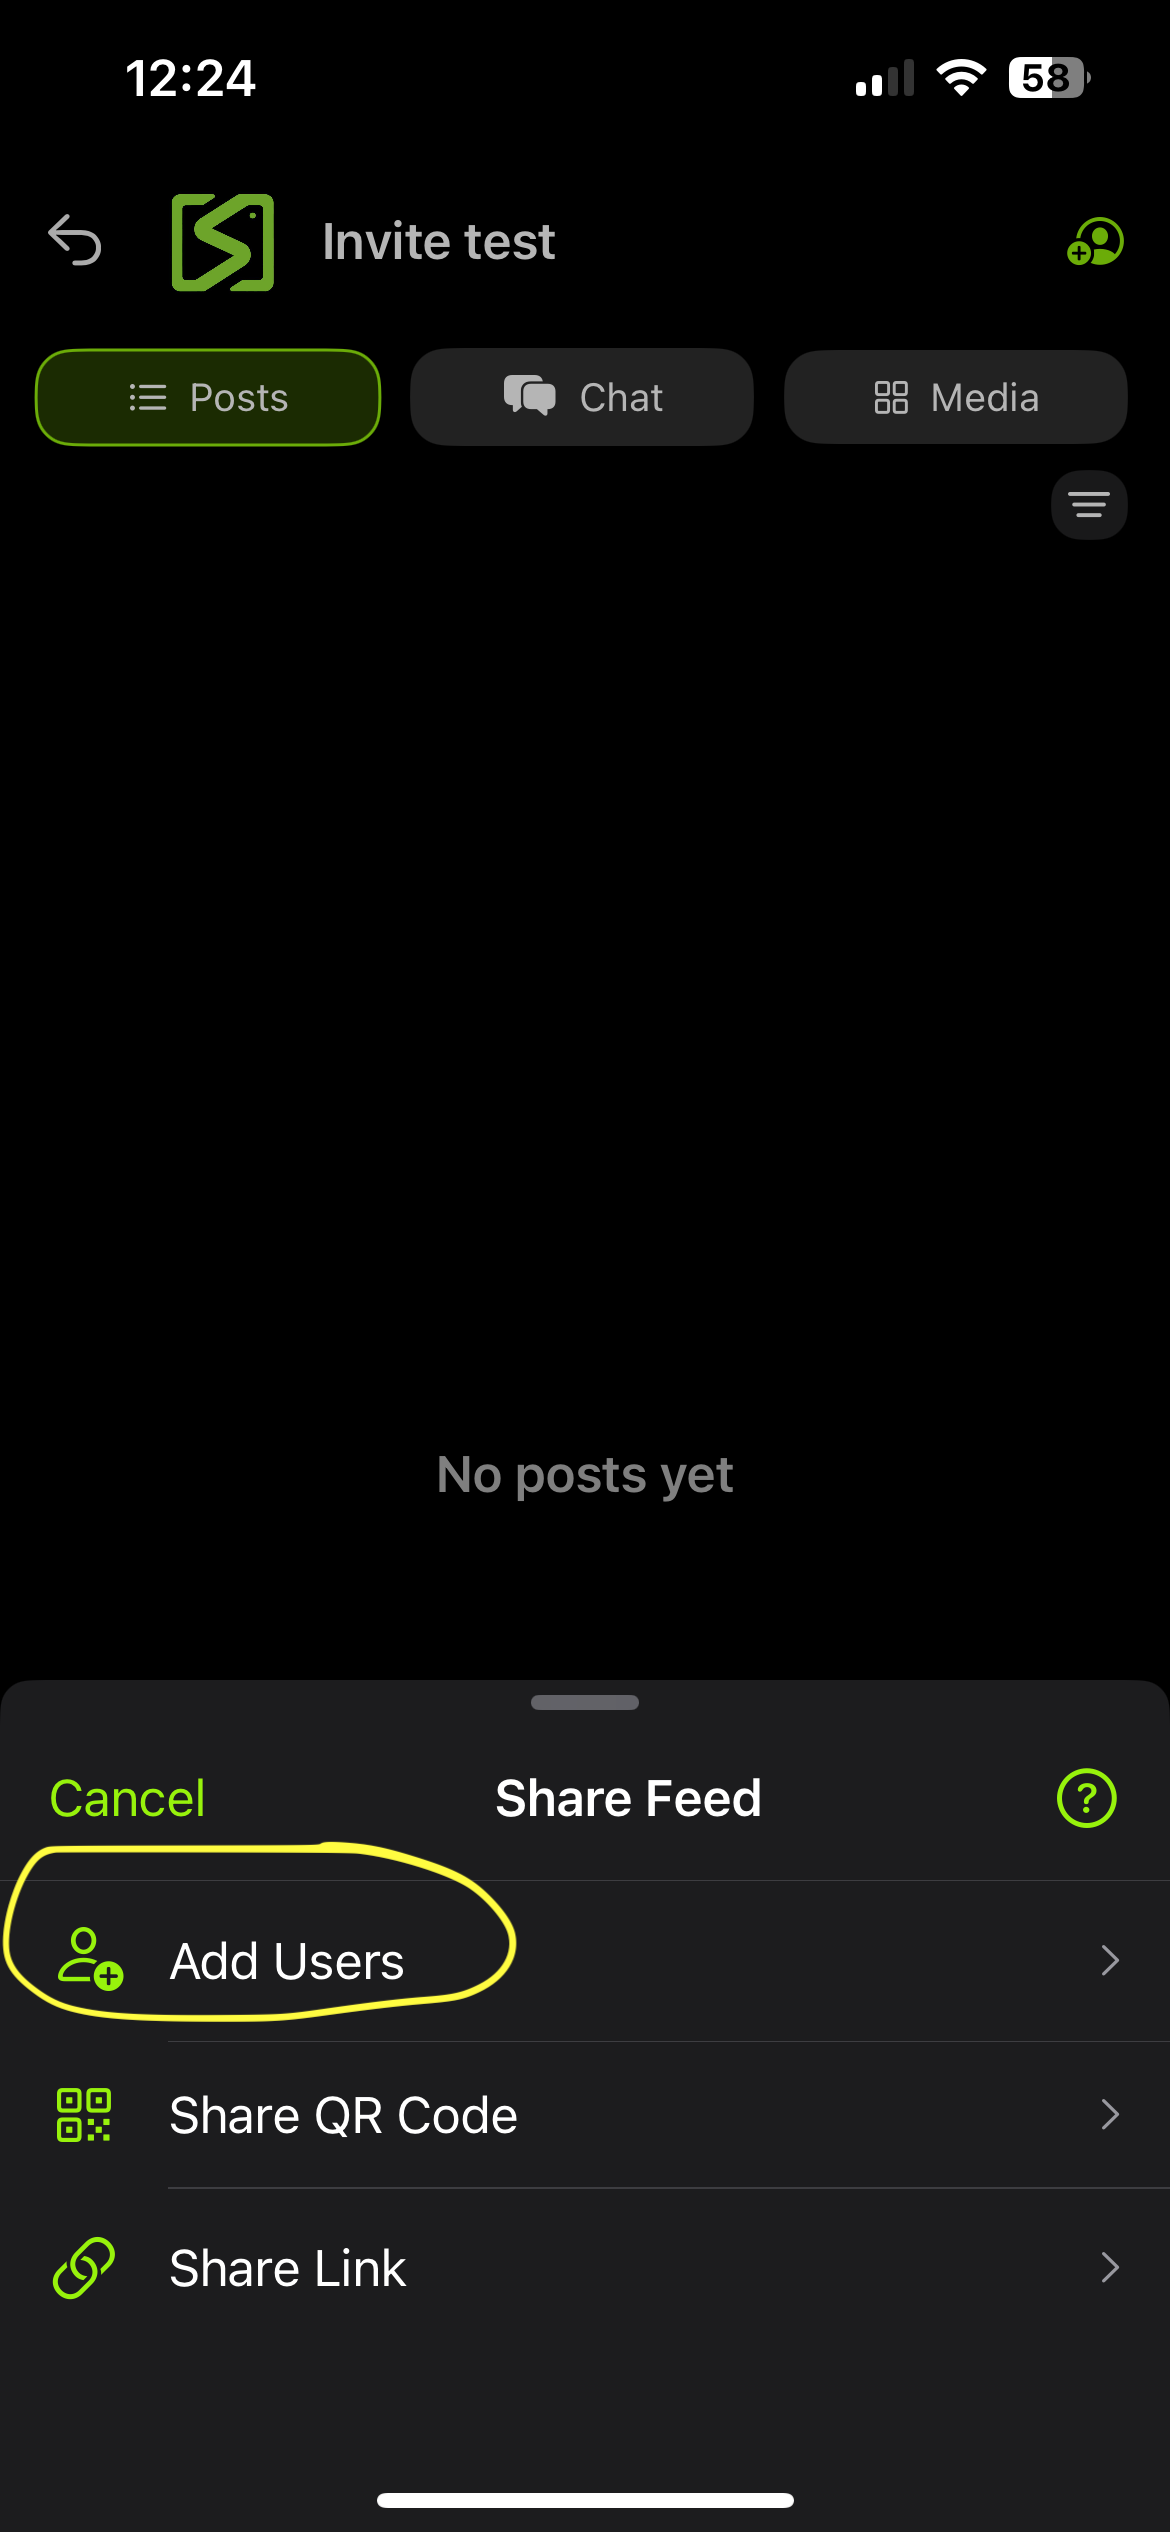
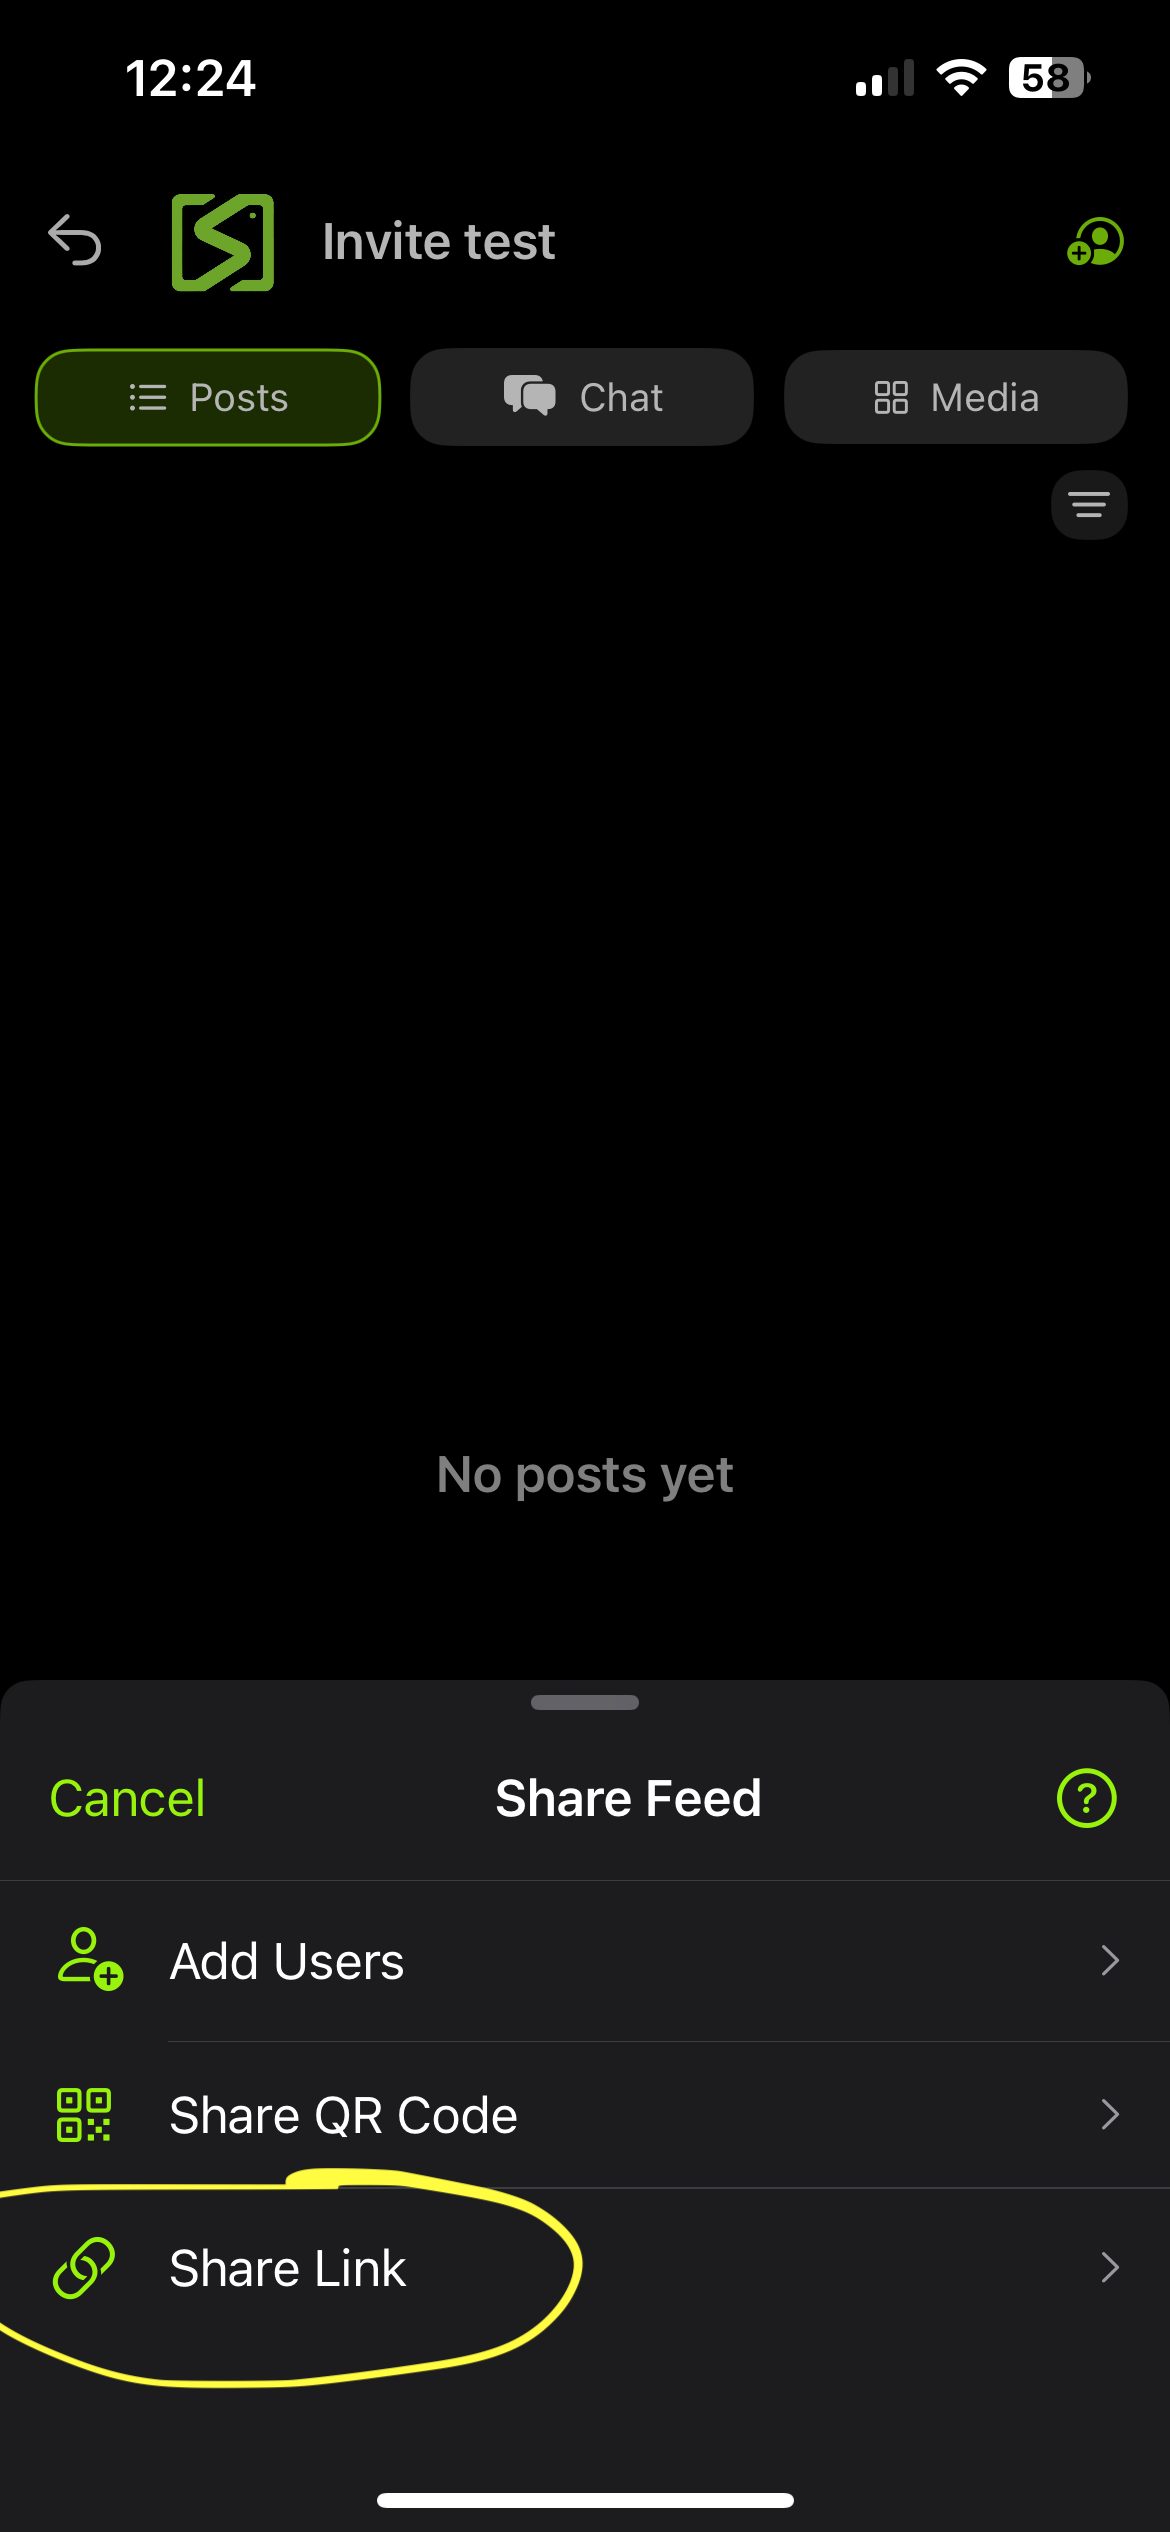
Inviting Clients
You can invite others to a feed if you are the feed admin. If you create a feed you are a feed admin. Private feeds can only have one other member. You can use QR codes, email address, or a link to add people to a feed.
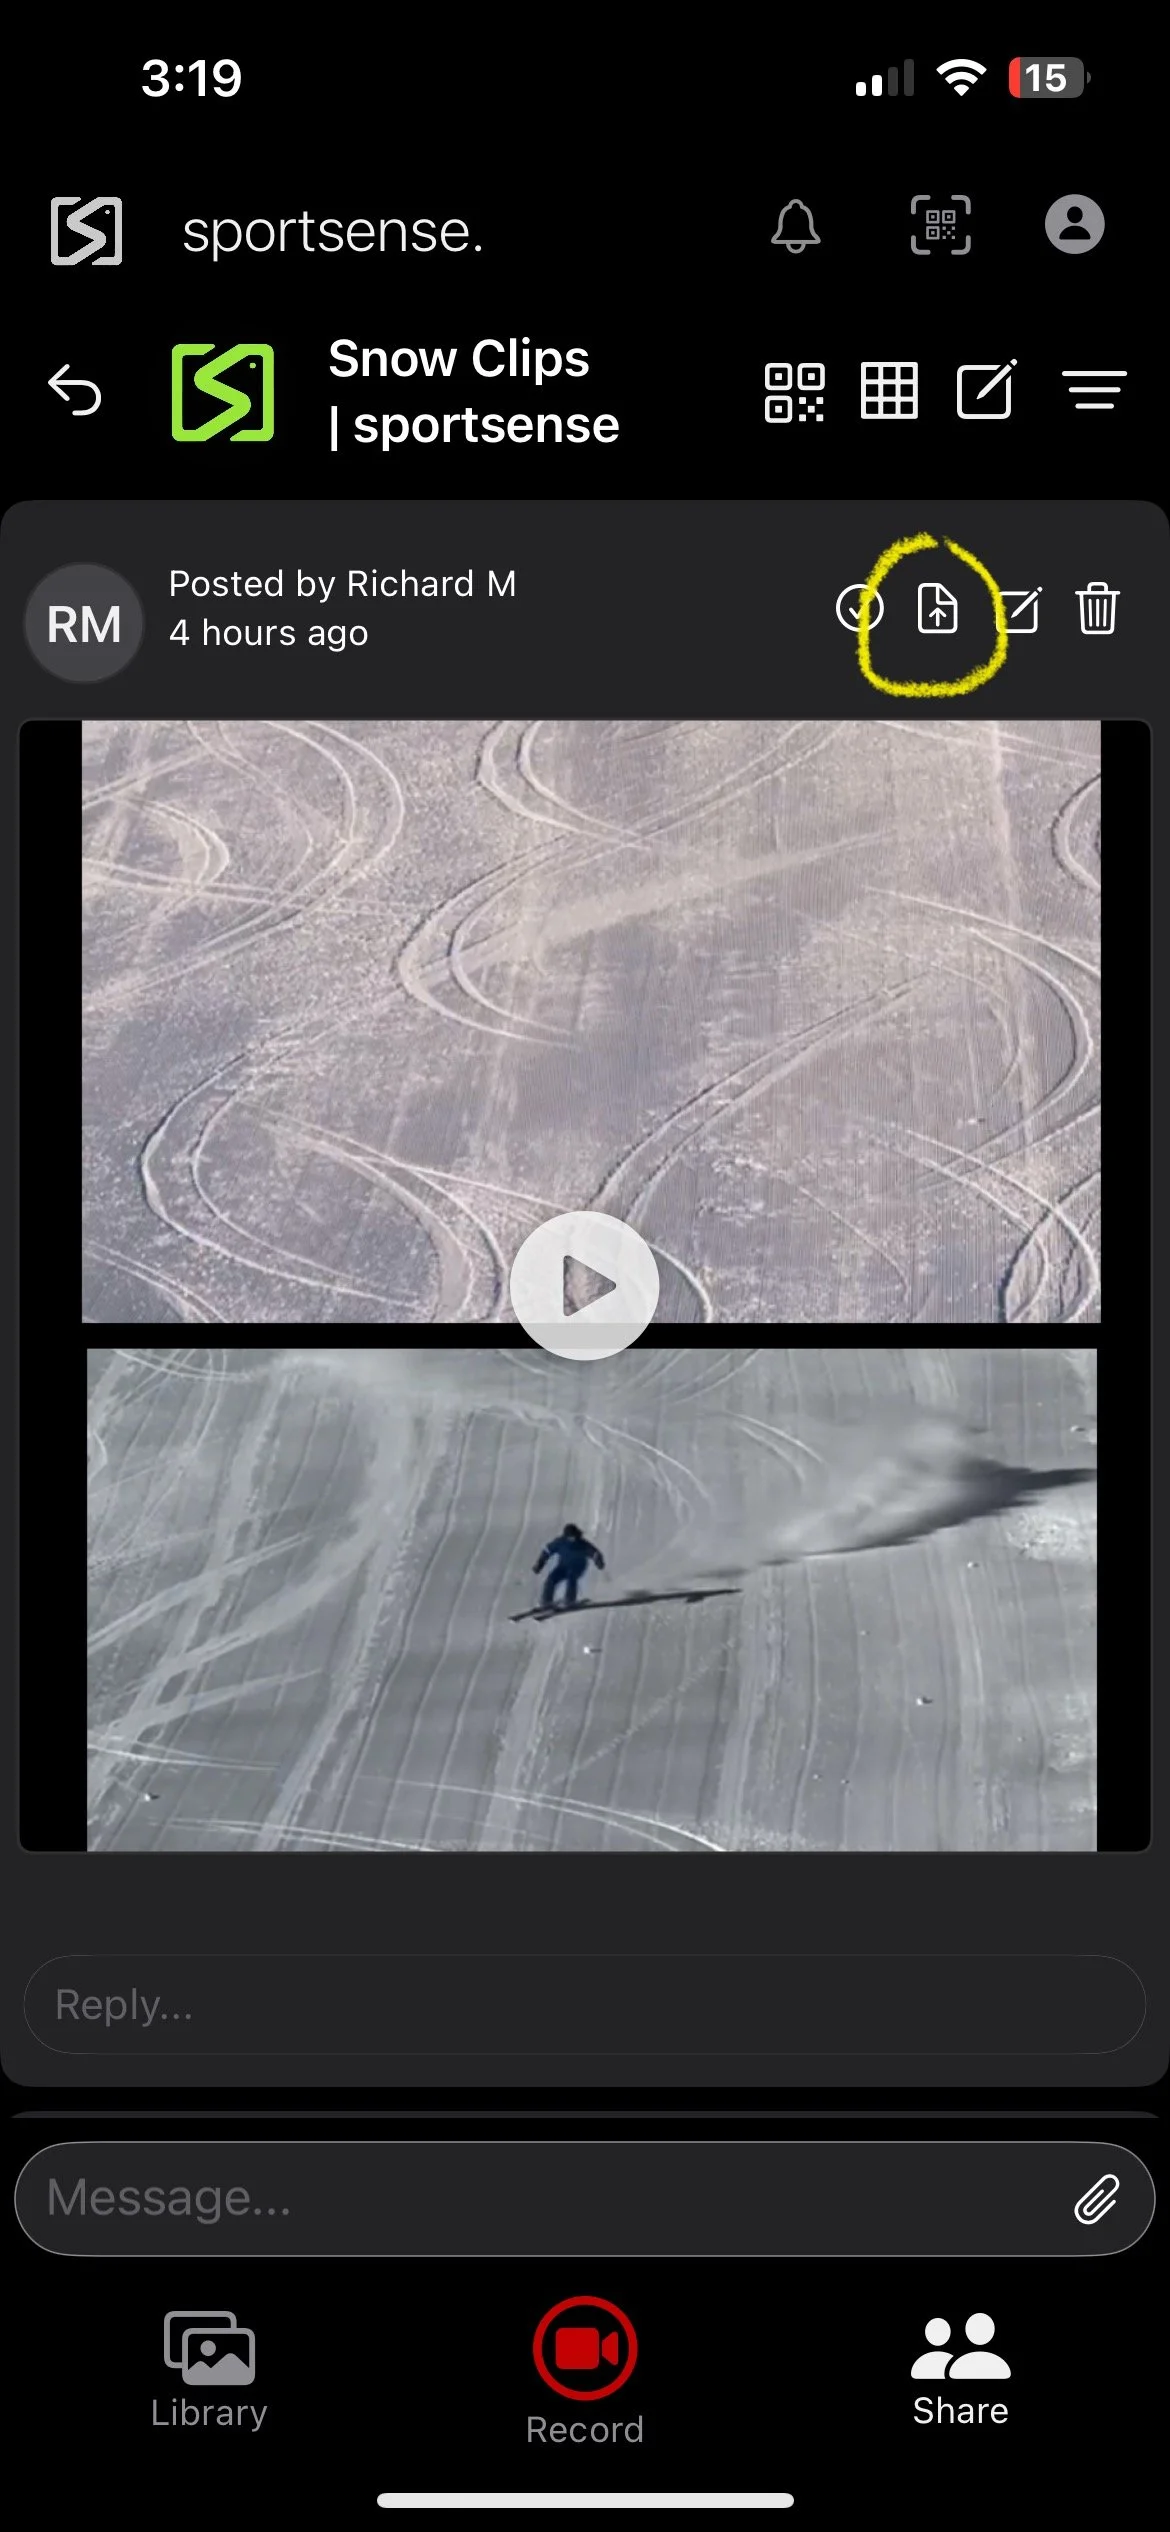
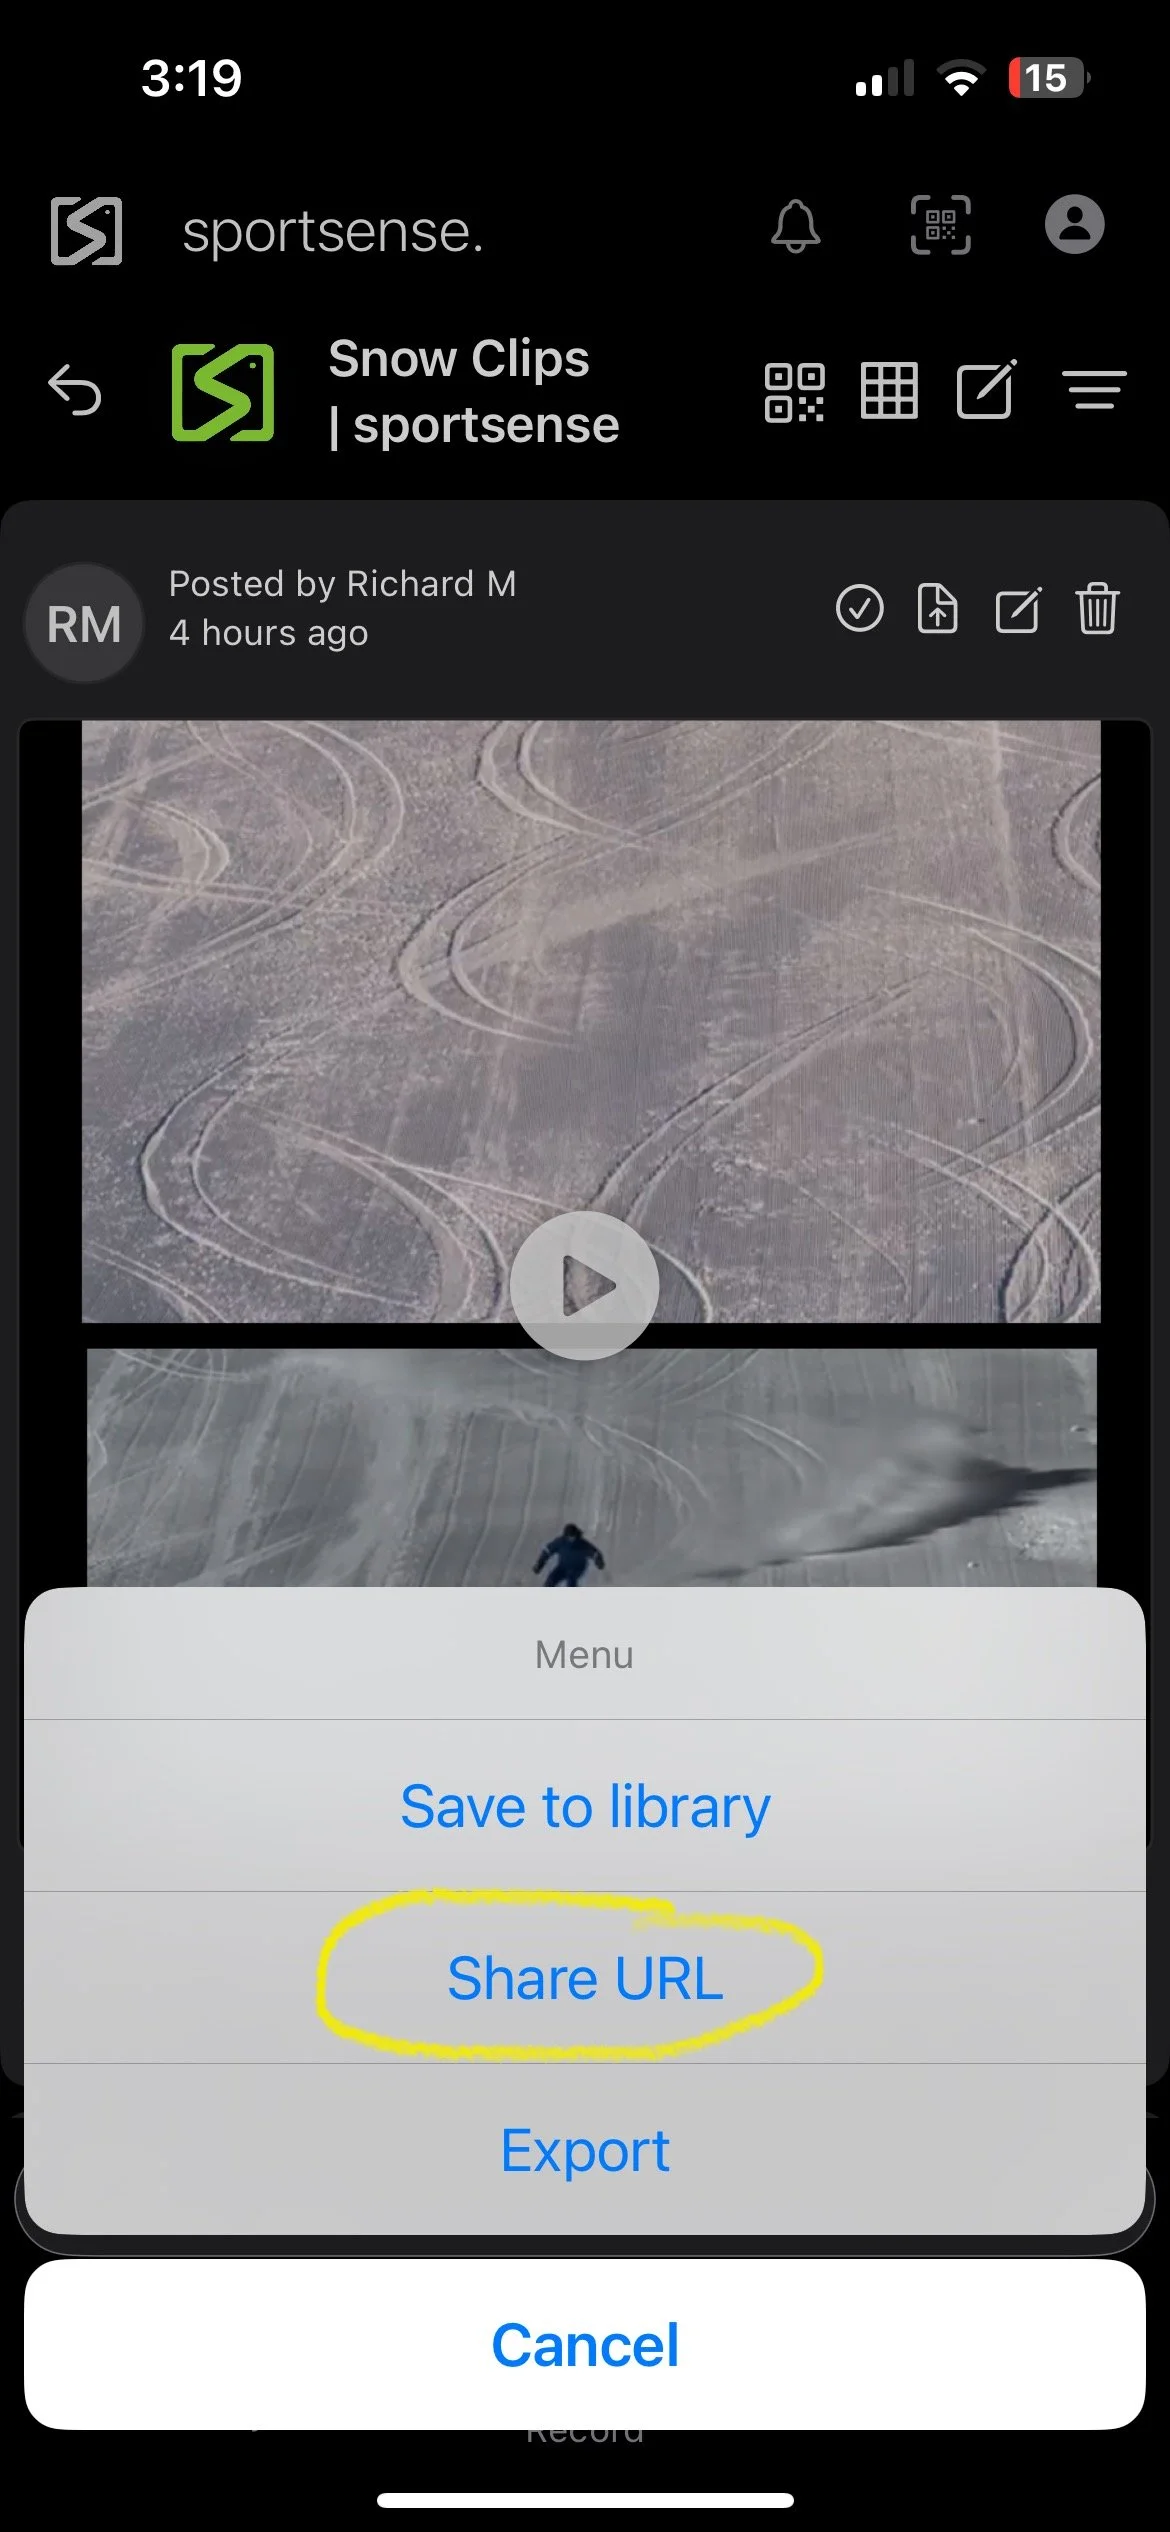
Share a Link to a Post
Videos within feeds can be sent to clients/athletes via URL without them needing to download sportsense.
Reference LibrariesPro
Reference libraries are feeds that allow certification bodies and coaching businesses to share videos to be used in comparisons. You must have a Pro license to create one. You can add other users to them like any other feed.
Race Feeds & SectorsBeta
For race teams, a Race feed adds course sectors, so every clip is filed by where on track it was shot.
- Create a Group feed and set the Sport to Race.
- Tag clips with sector 1 through sector 10, available under Actions in the tag picker.
- Uploads then organize by rider, sector, and date, with an Untagged group for cleanup.
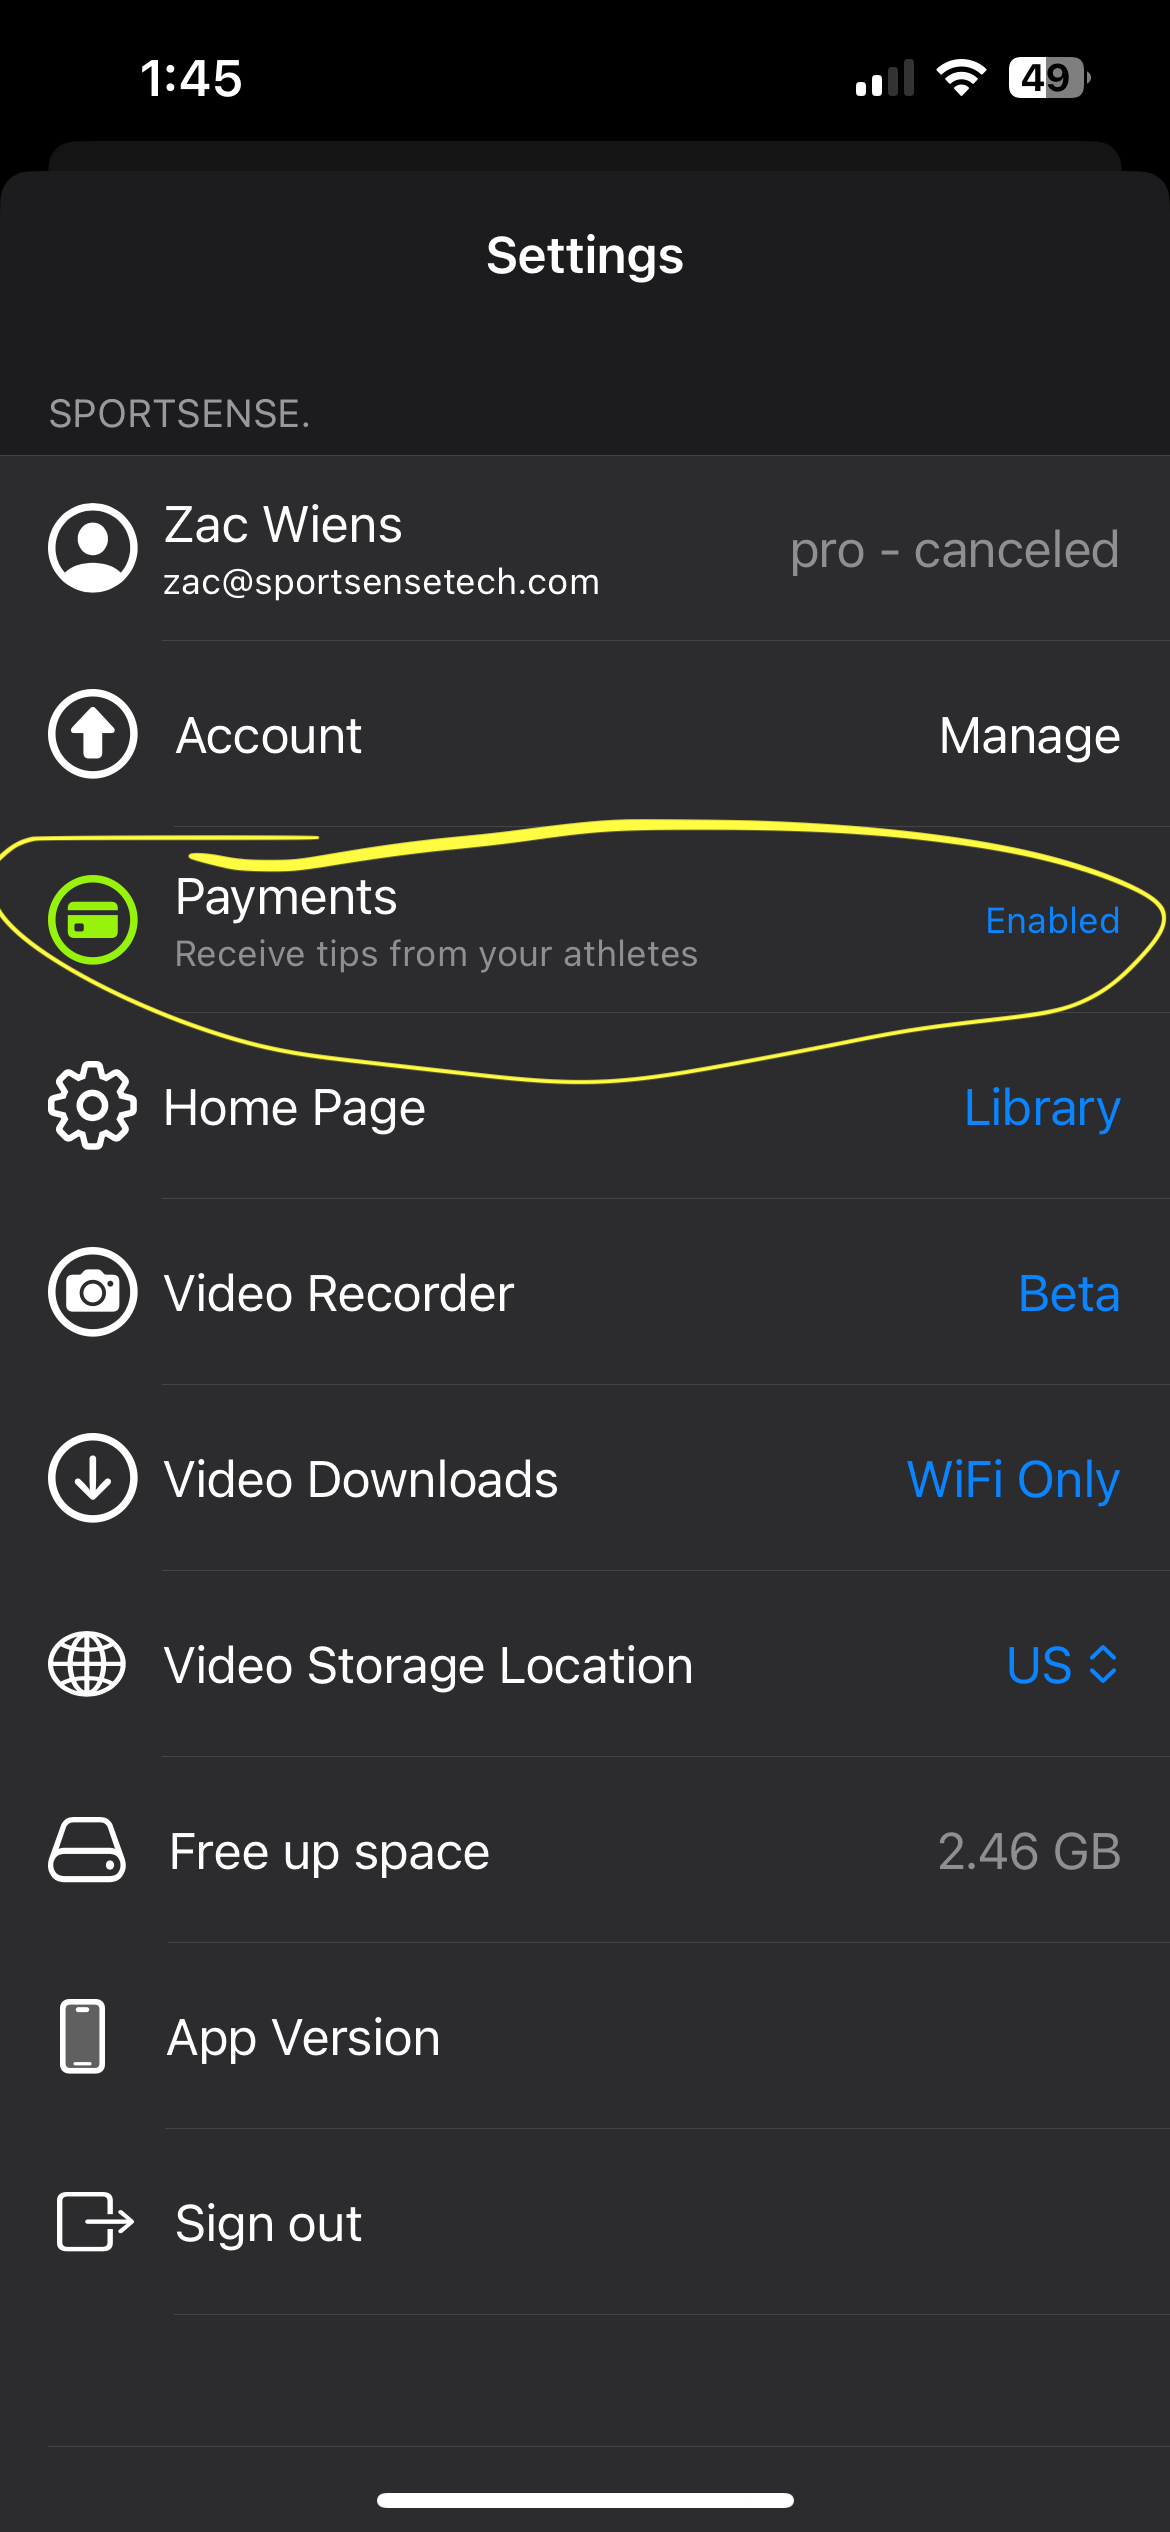
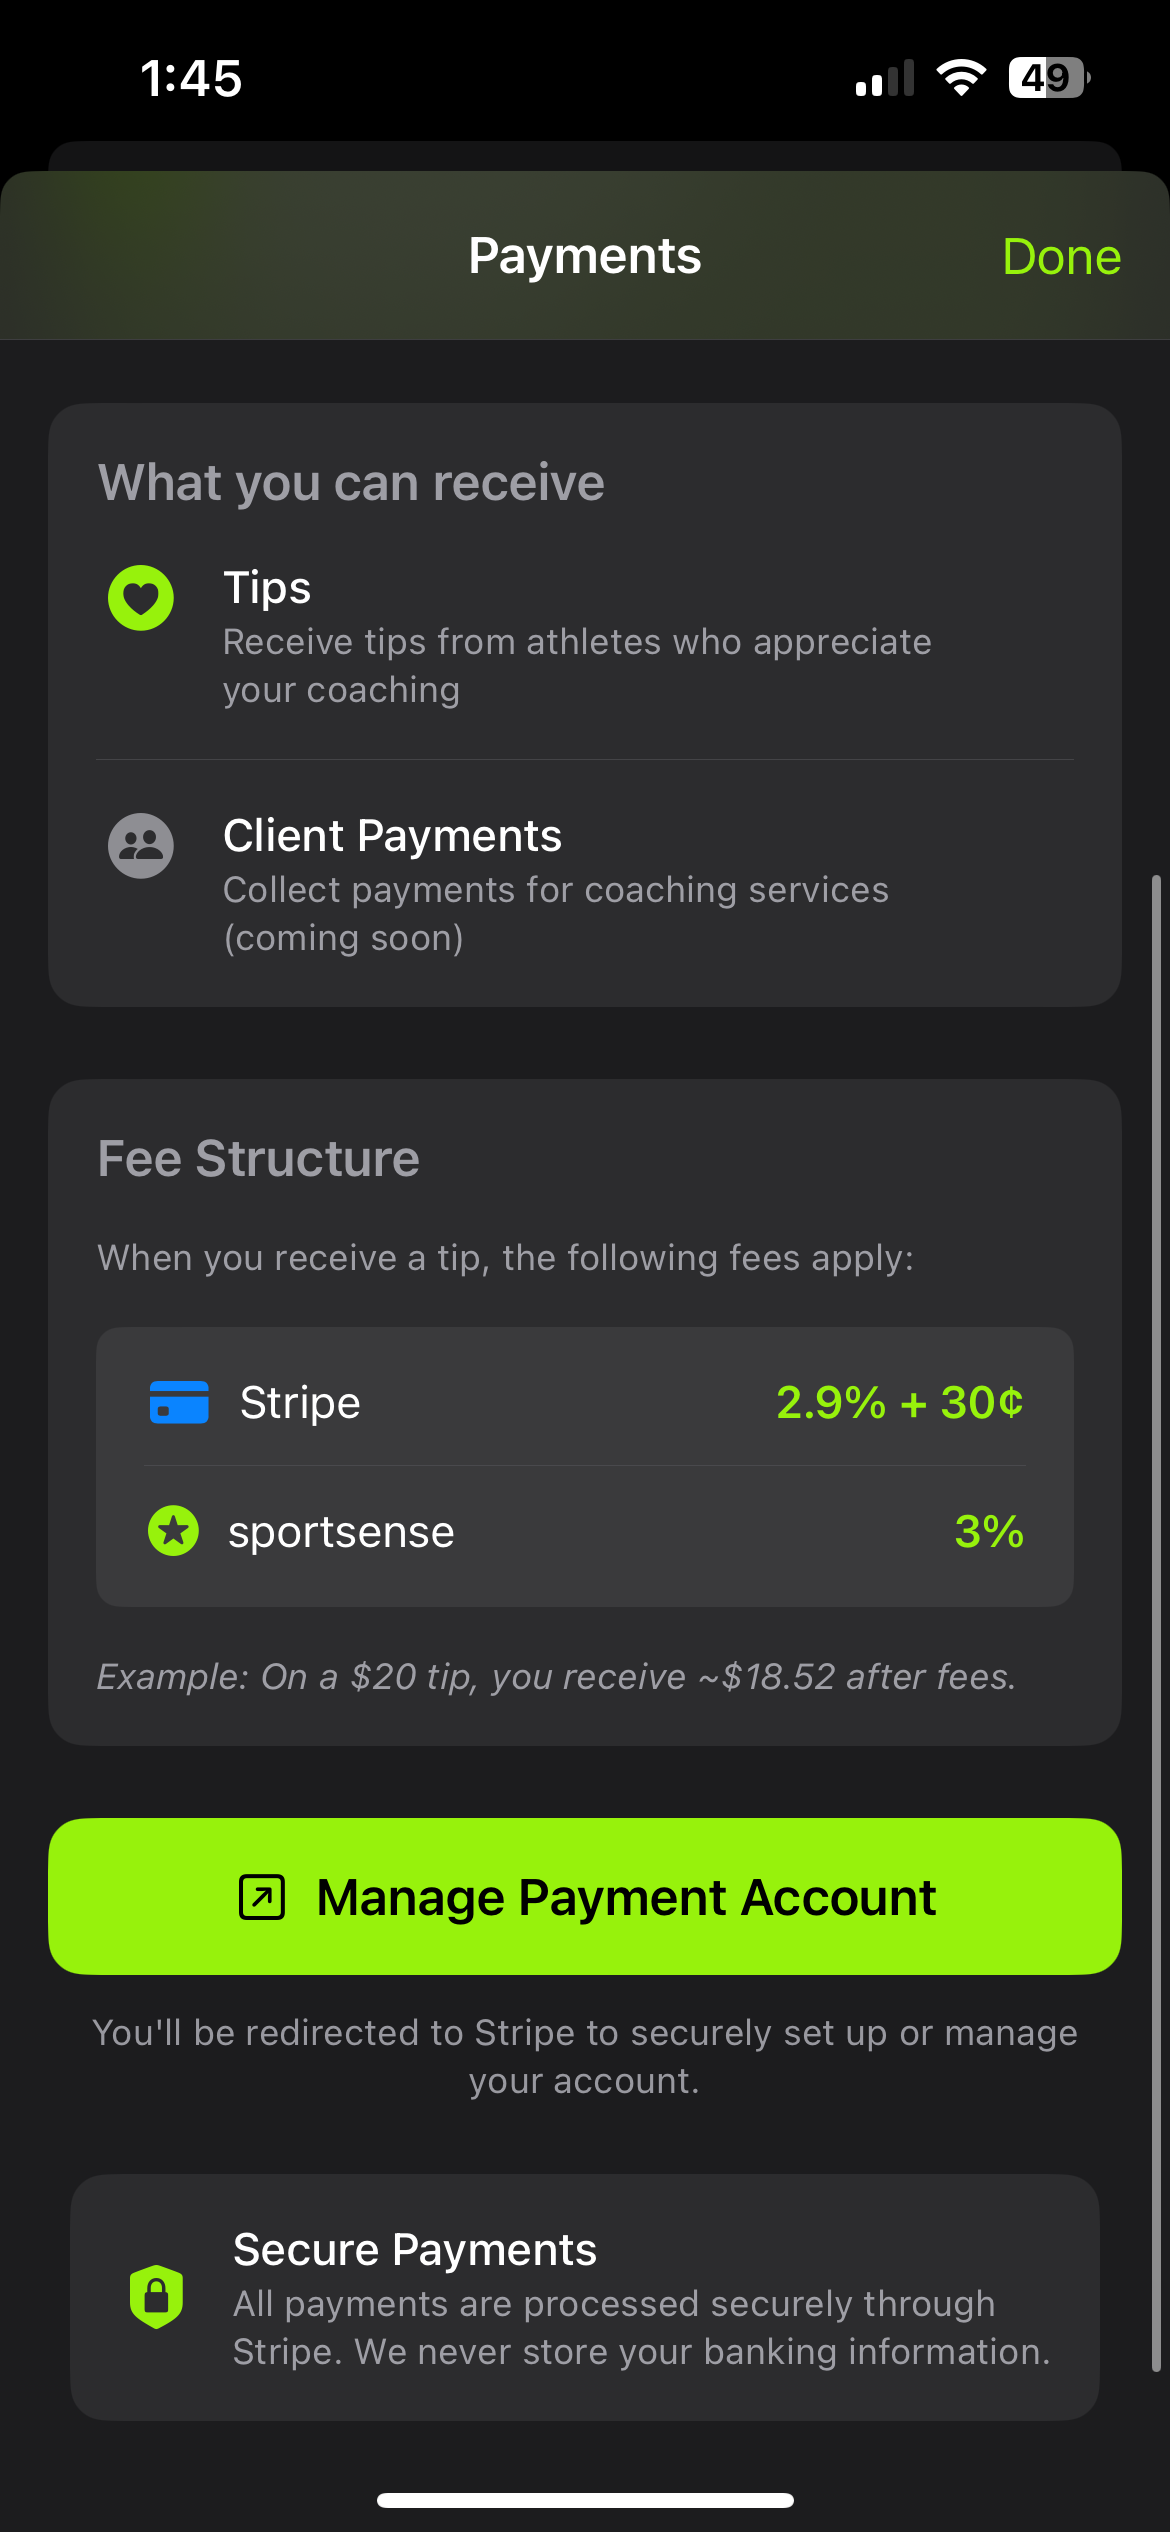
Payments.
Set up and manage payments within sportsense. Receive tips from athletes and clients directly through the app.
Setup Payments
To turn on payments for a feed in sportsense, you must set up your account with Stripe.
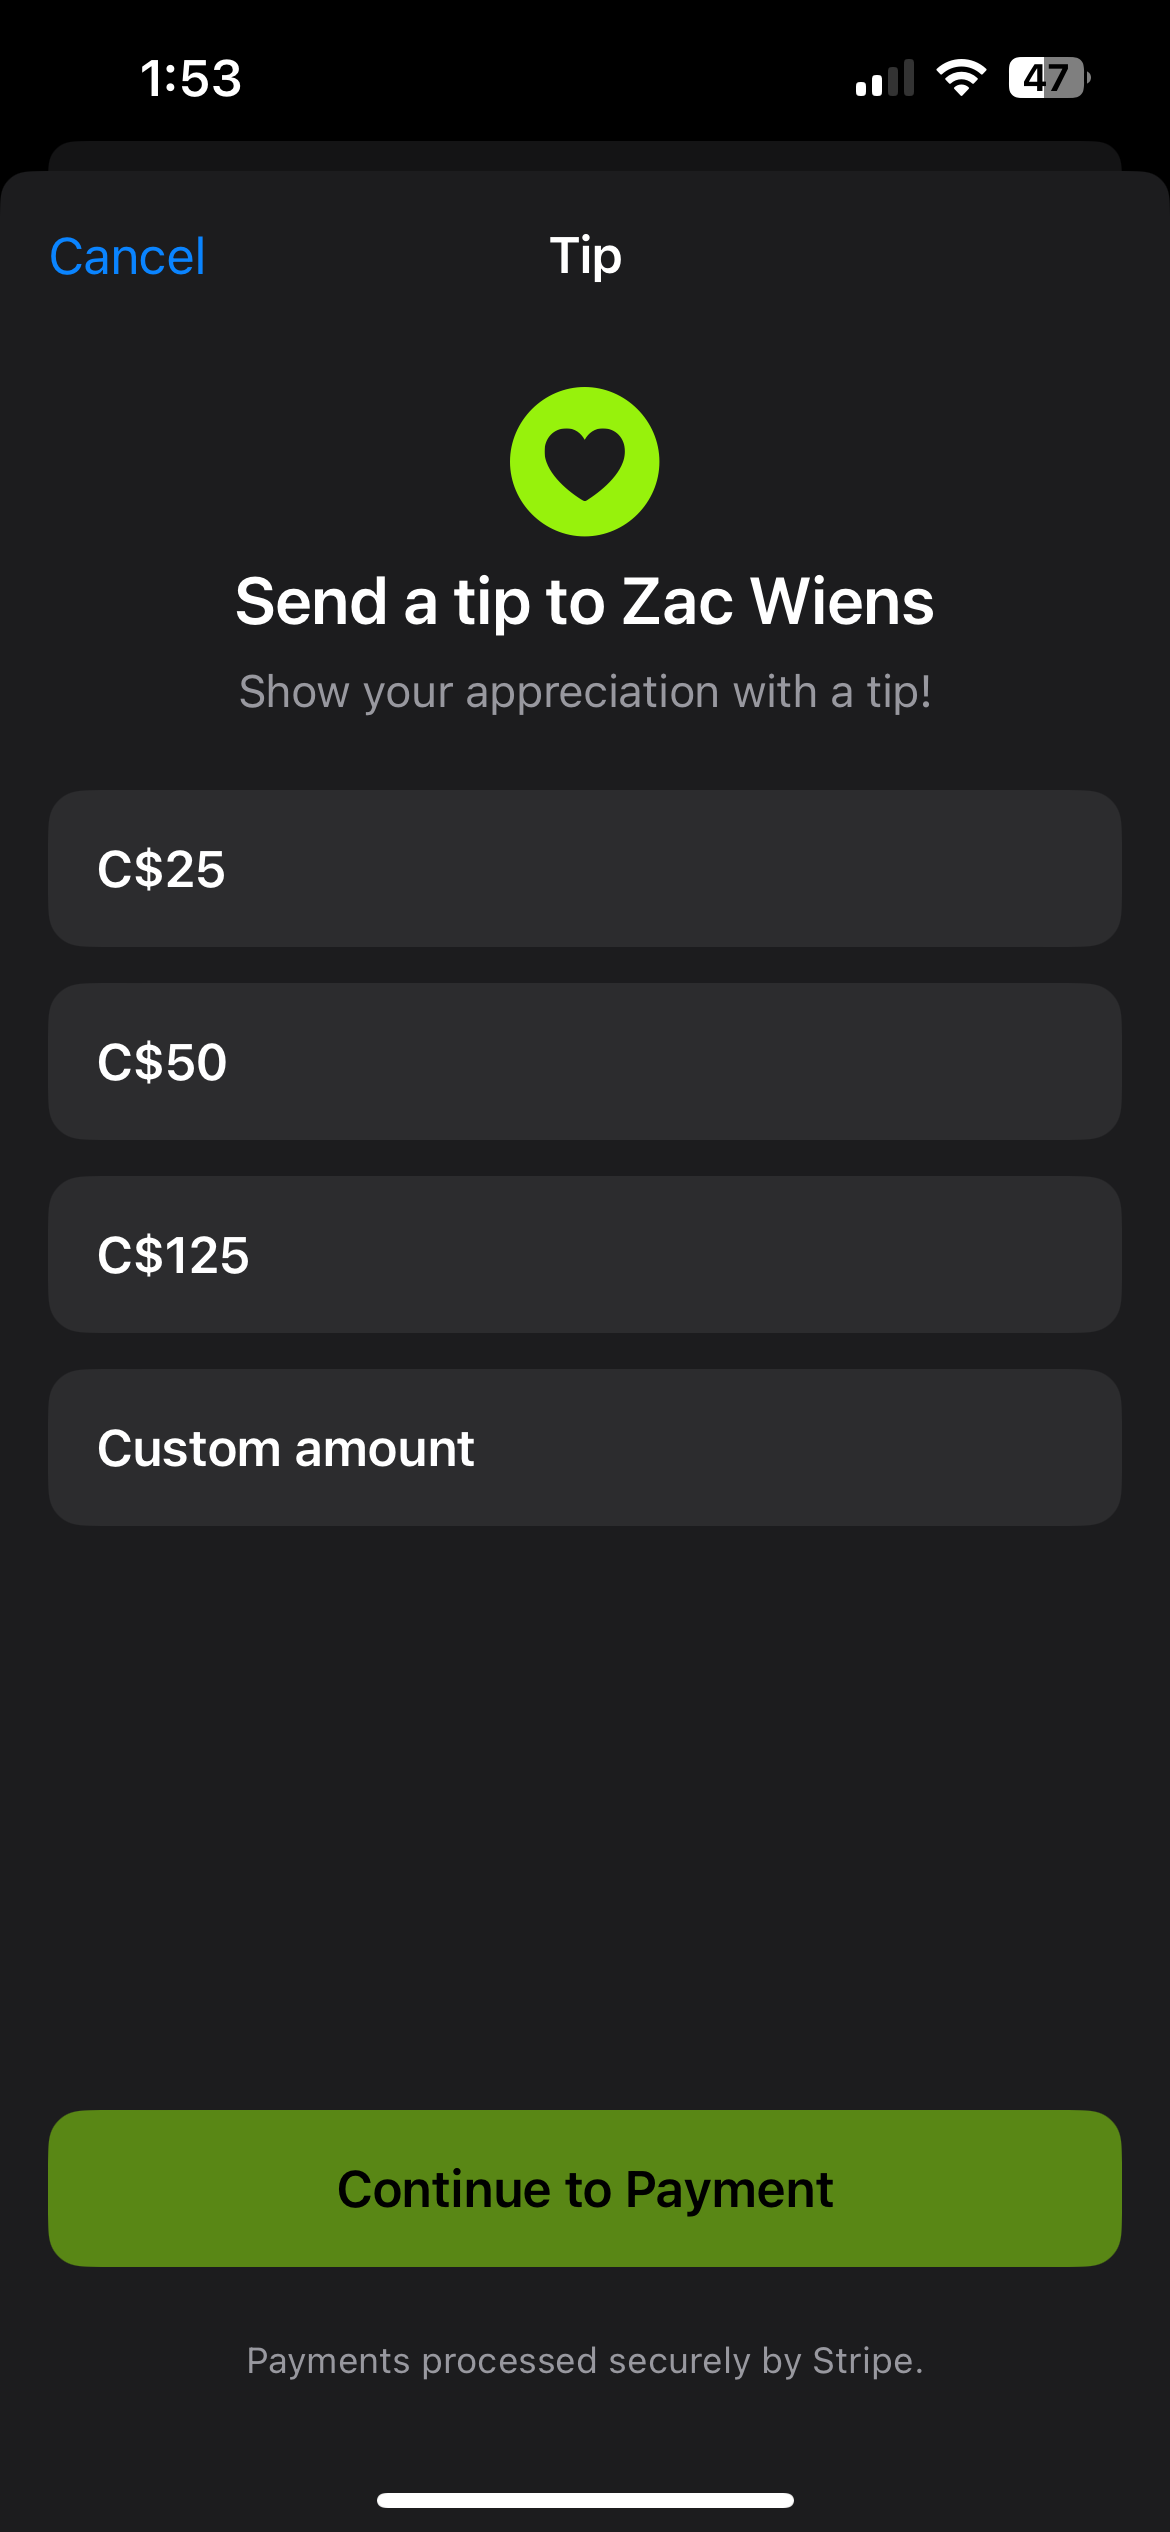
Receive Tips
- Step 1 - Set up your payment account.
- Step 2 - Create a feed and turn on tipping.
- Step 3 - Include a tip link when you share video feedback.
- Step 4 - Share your QR code or link with clients directly.
Tipping How-to Video
Watch the walkthrough video to learn how to set up tipping and get tipped in sportsense.

sportsense.
Free to Start
Paid plans are lowest priced when you subscribe directly through your sportsense account at sportsense.coach, since it avoids the platform fees that app stores add on top.